
Lifestyle
Domestic Goddesses provides a holistic life style management service. We strive to assist you in creating a harmonious well balanced life though healthy eating habits, movements, home management, home décor and refurbishments.
We will consult with you about all your personal health and home needs and set out a program to relieve the stress of the admin responsibilities of creating a home environment that gives you respite from the stresses of living a highly functioning life.

Grilled Fillet Balsamico
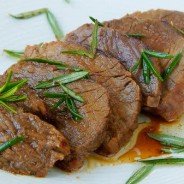
A dear Italian friend of mine and awesome cook taught me many years ago how to do this super simple and simply delicious, melt in your mouth fillet. It is a dish all my friends have recreated and I still get phone calls at odd times, asking for reminders on how to prepare it.
At first it seems like an unlikely combination to mix meat with vinegar but the sweet tanginess of the balsamic really compliments the flavour and its effect on the texture is awesome. Melt in your mouth like you cannot believe.
The secret is to keep the fillet as rare as possible as the acidity of the vinegar cooks it further and to get your oven or braai as hot as possible to build up a nice crust on the meat. It also lasts really well in the fridge and tastes phenomenal cold the next day.

Fillet Balsamico
Serves 4
800g of trimmed beef fillet
125ml of olive oil
125m of balsamic vinegar
30 – 40 fresh rosemary leaves, bruised
Marinate your fillet in the olive oil, balsamic vinegar and bruised rosemary leaves. Place the fillet in a snug container so the marinade can cover it and turn it every so often if you remember. I like to leave it for about 2 hours or so but longer is also fine.
When you are ready to cook the meat preheat your oven (or braai) on to top heat, as hot as you can get it. Remove the fillet from the marinade, place it on a baking tray and into the oven, reserving the marinade.
Grill the meat for about 15 to 20 minutes depending on the size of the fillet. Remove it from the oven and slice it into slices of about 1 – 2cm thickness. Arrange the slices onto a serving platter and pour the reserved marinade generously over the hot meat, return it to the oven for a further 5 minutes. You can then grind some salt and pepper over the top and serve immediately. The vinegar continues cooking the meat and gives a tenderness and flavour that is truly memorable.
Summer serving suggestion: crispy Mediterranean potatoes and rocket salad
Winter serving suggestion: Dijon mustard mashed potatoes and roasted root vegetables
Freshly baked bread
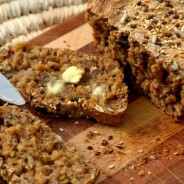
So I came to my senses and instead of baking a cake I baked bread. Eating a slice of bread just out the oven with butter, is just about as satisfying to me as eating a slice of cake. My mom always used to bake us fabulous bread when we were kids and I used her seed loaf recipe as the inspiration for mine.
I have modified it a bit by adding my ever faithful omega seed mix and my new craze Maca Powder both of which I think give this loaf great flavour and an added ‘health’ fix.
The great thing about this bread recipe is that it is really easy, with no kneading. Just mix, prove and bake.
I bought a silicone bread mould as I have been enjoying baking in silicone but this is one mould which is not better than a regular tin. If you fill the mould to capacity it sags badly in the middle giving the loaf a rather odd shape.
This recipe should be pretty easy to teach your housekeeper to make for your family, so you can have fresh bread as often as you need it.

Whole wheat seed loaf
Makes one loaf in a 23 x 13 x 8cm bread tin
1 cup pearl barley, soaked for at least 1 hour in 1 cup of boiling water
1 cup of mixed omega seeds, lightly toasted
2 1/2 cups of stone ground whole wheat flour (or nutty wheat)
1 sachet instant yeast
1 Tbsp of brown sugar
4 Tbsp Maca Powder (totally optional)
2 tsp salt
1 1/2 cups of lukewarm water
2 Tbsp of olive oil (optional)
Oil or spray ‘n cook for the pan
Mix all dry ingredients – add water slowly with the soaked cracked wheat and the water it soaked in.
The mixture must not be too sloppy or too solid. Stir well until the gluten starts forming. Add oil, if using.
Oil the bread tin and pour the mixture in. Place in a warm spot (I find the oven perfect, I just warm it a very little, then turn it off and leave the door open) for about ½ an hour – the bread should have doubled in size. Do not bump or disturb it at this stage or it will collapse.
Put into the oven and turn it to 180C˚ and bake for about 50mins or until brown, crisp and giving a hollow sound when tapped.
Take out of the oven, leave for 5mins then gently shake it out of the tin and let it cool on a wire rack until quite cool.
Send me the perfect excuse to bake this again!
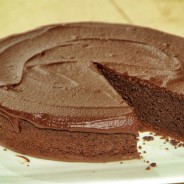
I’m neither a cake fan nor a sweets fiend but today all I can think of is the chocolate cake I trained yesterday. I am blaming my hormones for this mess, as no other cake will do. I am feeling overwhelming compelled to bake it again, for myself this time… I have been trying to find a good excuses… who’s birthday is it, who is feeling down and needs cheering up… I can’t bake an entire cake for a two person household just on a whim, can I?
If you live in Cape Town and can give me a perfect excuse to bake it, I’ll personally deliver you a slice tomorrow. Promise.
One of the things which I think may have made the difference to this cake it that I used only the best ingredients I could find. Lindt 70% chocolate, NoMU cocoa and vanilla paste, Lurpak butter. The chocolate flavour is crazy intense but the texture is still so light and fluffy. Man, that’s some good cake.

Devil’s food cake
Serves 8 – 10
125g of dark or milk chocolate, broken up
¼ cup of cocoa powder
1 cup of boiling water
¾ cup of all white bread flour
¾ cup plain cake flour
1 tsp of bicarbonate of soda
½ tsp of salt
250g of butter
1 cup of dark brown sugar
3 large eggs
½ cup of sour cream or crème fraiche
1 tsp vanilla extract
Chocolate fudge icing
¼ cup of sugar
½ cup of milk
50ml of cream
125ml of dark or milk chocolate, broken up
Pre heat the oven to 180 degrees. Combine the chopped chocolate and cocoa in a bowl, pour over the boiling water and whisk until smooth. Sift your dry ingredients together.
Beat the butter until soft and then add the sugar and beat until light and fluffy. Add the eggs to the mixture one by one beating in between to combine. Add the cream and vanilla.
Then add half the dry ingredients followed by half the chocolate mixture and then repeat until all is just combined. Don’t over beat.
Pour into a greased cake tin scrapping the batter more towards the sides of the cake tin and bake for 35 – 40 minutes or until a skewer placed in the centre of the cake comes out clean.
Allow to cool before turning the cake out and allow the cake to be completely cool before icing.
For the icing, simmer the sugar and milk in a small sauce pan until it reduces to half and is thickening slightly. Then remove it from the heat, add the cream and chocolate and allow it to melt. Stir it with a whisk until smooth and silky. Pour the icing in the centre of the cooled cake and smoothed it with the back of a spoon until it just starts oozing over the edges of the cake.
Reclaiming ricotta
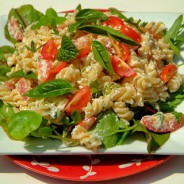
I resurrected a pasta salad recipe I had learned many years ago from an Italian friend of mine, for a training session I did this weekend. There’s not much of a story to tell around this dish, it just is what it is (which is quite a allot in itself) – it’s flavour packed, pretty healthy and balanced, easy and accessible to most palates. It makes a great accompaniment to a main meal or is a perfect light meal on its own. You can eat it just like that or add more veggies – like peppers, olives, baby corn, snow peas etc. or add proteins like crispy bacon or chicken.
Ricotta is a much neglected diary product in my kitchen, but I plan on changing this after using at again twice this weekend. It tastes great (I think, even better than cottage cheese) but it’s one of the lowest fat options of diary product you can get. It is a great source of protein, has the good omega 3’s, is high in calcium, zinc and selenium, riboflavin and vitamin B12. It’s also low in sodium. It’s creamy and tangy and great in so many recipes. The annoying thing is it’s not available in all supermarkets. Woollies usually has it and some of the bigger Pick n Pays.
Okay – enough with adjectives and list. Let just get toe recipe which is straight forward.

Herby ricotta and cherry tomato pasta salad
Serves 6
250g ricotta cheese
Half a chilli finely chopped (optional)
3 Tbsp extra virgin olive oil (reduce if desired)
1 large clove of garlic, finely chopped
¼ cup chopped fresh herbs (reserve a few for garnish)
½ tsp of salt
¼ tsp of fresh ground black pepper
250g mini Italian tomatoes, cut into quarters (reserve a few for garnish)
250g fusilli pasta cooked in very salty water and drained
80g salad pack of choice (optional)
In a large bowl combine the ricotta, chilli, oil, garlic, herbs, salt and pepper by mashing it up together with a fork. Add the tomatoes and pasta and combine lightly with a fork. Refrigerate until ready for use.
Before serving arrange the salad leave on a platter and spoon the pasta salad mixture on top. Garnish with a few tomato quarters and the fresh herbs.
The Ultimate Roast Chicken Stuffing
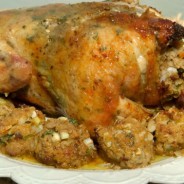
There are few foods as satisfying as a good roast chicken. Aside from a few twists and tweaks you can add, it is also pretty straightforward and the simplest methods to make a roast chicken are usually the best. I have read volumes on how to roast the best chicken, but seriously why complicate something so simple and so rewarding?
I did, however, decide to complicate things a little last week. I was training two lovely ladies on how to roast a chicken perfectly and wanted to spice things up a bit.
I have never personally made a roast chicken with stuffing before as it is not a South African tradition. But as I had leftover bread which had dried out it seemed like roast chicken stuffing was an obvious addition to the menu.
I surfed around the net a bit for ideas but decided on a very simple roast chicken stuffing which was easy to make from the ingredients I had in the cupboard. It was UNBELIEVABLE!!!! I can’t believe it has taken me so long to discover a roast chicken stuffing recipe.
Come on South African, the whole of America is nuts about it, why doesn’t everyone make it here? I will go as far as to say I will never roast a chicken without stuffing ever again. In fact, I think I will be roasting chicken just so that I can enjoy the stuffing again!
I had also made far too much stuffing to fit inside the chicken so I made little balls of it and placed it around the chicken about 30 minutes before the bird was cooked and they sucked up the flavor of the cooking juices… wow!
Okay – enough already. Just try it and thank me later.

Roast chicken stuffing with herbs
Enough to stuff one chicken and leftover to make “stuffing balls” or enough for two whole chickens
3 cups of dried bread crumbs (I recommend using leftover specialty bread, like rye, spelt, ciabatta, sourdough, etc. – dried and crumbled in a food processor)
1 medium onion, peeled and finely chopped
2 cloves of garlic, peeled and finely chopped
¼ cup of fresh herbs, finely chopped – I used rosemary, sage, thyme, and basil
¼ of a cup of Mrs. Balls Chutney
2 eggs
1 cup of chicken or veg stock
1 tsp of salt
½ tsp of freshly ground black pepper
2 Tbsp of cold butter, chopped into little pieces
Combine all of the above ingredients in a mixing bowl and stir until it forms a loose dough or paste-like texture. Stuff your chicken and roast in a roasting pan which has enough room for you to add the stuffing balls later.
30 minutes before your chicken should be ready, take it out the oven and place balls of stuffing about the size of golf balls all around the roasting pan. Roast for a further 30 minutes. Remove from the oven and spoon some of the cooking juices over the stuffing balls before serving.
Roast chicken recipe:
½ a cup of salt
½ a cup of sugar
1 whole free-range chicken
2 Tbsp of soft butter
2 tsp of crushed garlic
1 tsp of lemon zest
1 Tbsp of lemon juice
½ a cup of fresh herbs, picked and chopped (parsley, oregano, thyme, basil)
1 tsp of salt
1 Tbsp of olive oil
Pre-heat your oven to 200˚C and place the rack in the lower half of the oven.
Wash the chicken and soak it for an hour submerged in one liter of cold water, with half a cup of salt and half a cup of sugar dissolved in it. Remove the chicken from the water and pat it dry with kitchen paper from the inside and out.
Make a paste by combining the butter, garlic, lemon, herbs, and salt. Loosen the skin of the chicken over the breast meat by putting your fingers between the flesh and the skin, freeing the connective tissue. Loosen the skin right over the breast meat and legs. Flip the chicken and do the same with the skin over the thighs. The skin is less stretchy here, so be careful not to tear it.
Dot balls of the herb paste under the skin and gently press them flat with your fingers over the skin, evenly coating the whole chicken. Rub the skin with a little oil and sprinkle it with a salt.
Place it in a small roasting pan, breast side up. Roast for about 45 minutes to an hour turning the chicken every 15 minutes.
(Don’t forget to add your roast chicken stuffing balls 30 minutes before the chicken is done!)
If this skin is not golden and crispy, turn on the grill for a few minutes. Remove the chicken from the oven, covered with a lid and allow the chicken to rest for 15 minutes. Carve and serve.
Pin for later!


Risotto myths…
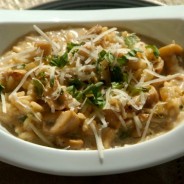
For reasons completely obscure to me people think risotto is difficult, time consuming and tricky to make. This is simply not true! There are some traditional methods of making risotto which are completely beyond me – rules where the meat / veggies and the rice are prepared separately and where the rice needs to be stirred continually while the rice is cooking. This is all rubbish.
Simply get a good tasty stock going, add the veggies which can be cooked for 10 minutes on simmer (if not add them later in the cooking process). Add the rice and allow it to cook for about 8 minutes until 90% cooked. Gently stir it from time to time, simply to prevent sticking. Now the rice will have sucked up all the great veggie and stock flavours. Not over stirring means that the rice is left with great body and the risotto isn’t like porridge. Add the cheese and cream if using and you’re done. 20 minutes tops, not fuss.
Try my mushroom risotto below, it’s fool proof and totally delicious. Adding bacon at the same stage as when you’re frying the mushroom adds great flavour! For greens add asparagus tips or peas half way through cooking. It is a winner recipe.

Mushroom Risotto
Serves four main course portions
30 g of dried porcini mushrooms, soaked in a cup of boiling water (optional, but if not using add an extra cup of stock or water)
3 Tbsp olive oil
500g button mushrooms
1 medium onion, peeled and chopped
1 clove of garlic, finely chopped
½ tsp of cumin
½ tsp of coriander
½ tsp of mixed spice
1 Tbsp of soya sauce
½ tsp of freshly ground black pepper
1 ½ tsp of salt
500ml of vegetable stock
250ml of water
1 ½ cup of Arborio rice
1 tsp of fresh chopped herbs, like thyme, sage, oregano, basil etc.
125ml of cream
1 cup of grated parmesan
Get your dried porcini soaking in boiling water. Heat the oil in a medium size heavy bottomed pot and add the mushrooms, onion and garlic. Fry them on medium heat until the mushrooms have reduced to half their size. Add the spices and soya sauce and fry until the mushrooms start to colour in the pan a little.
Add the water, stock, porcini and the water it was soaking in and stir until the flavours from the mushrooms have combined nicely with the stock. Add the rice and allow it to cook on a light simmer for about 7 – 10 minutes (taste the rice, it should be very slightly under done). Only stirring every now and again so as to ensure that the rice doesn’t stick to the bottom of the pot.
The dish is ready to remove from the heat when the rice is about 90% cooked. It must still have a little bite in it, as it will carry on cooking with the retained heat of the pot and rice. Add the herbs, cheese and cream, stir lightly to combine and allow this to stand with the lid on for a further 10 minutes before serving.
Superfoods for fast paced living
This week is a crazy week for me so prolific blogging will not be on the cards, neither prolific cooking for anyone other than my clients.
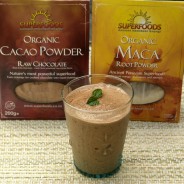
Yesterday I was on my feet all day teaching and then ended off cooking dinner for 14 people in celebration of my dear friends birthday. A few too many glasses of bubbly and late night after a long day I need an energy boost to get me through the rest of today. I have just whipped up and am sipping on a raw cacao, maca root powder and banana smoothie. It tastes great, was quick to make and I know I am getting the natural boost I need. I think kids would love it too, cause it tastes like milk shake.
I am very into superfoods powders at the moment, when you read up about them it’s hard not to be impressed. Maca root powder sports the following list of qualities. Increased energy, endurance and strength; blanaces hormore levels; improves brain function and boost immunity. It also mentioned something about increased libido and fertility.. mmm. Wow that’s quite a few promises there packed into a packet of powder.
Raw cacao (aka raw coco powder) is a great source of magnesium, is a natural anti depressant, aids with weight loss and it’s one of the highest sources of antioxidants of any food there is. Cool.
I blended a spoon of each powder with a banana (which I had frozen), some milk and added a touch of stevia for sweetness. I should be ready to take over the world in about 45 minutes or so!

Sepia tinted thoughts and Karoo farm flavours

I have a list of firm family favourites which I often suggest when I set up a cookery training plan for a family. The one recipe which almost all families choose is chicken pie. Chicken pie is the ultimate comfort food. It has an old fashioned appeal, conjuring up sepia tinted thoughts and Karoo farm flavours.
Despite being such a loved dish, very few people actually make it at home and I don’t blame them, its time consuming. The ready-made product is available at almost every store, so opting for the short cut is just so easy.
I have for a while been considering ways to simplifying the recipe and think this may be a good option. Store bought puff pastry, ready roast chicken, mushroom sauce – combine. Easy!
The combination is just right, the pastry is light and crispy; the filling is thick and juicy and the whole dish looks pretty too. Serve it with a big salad and creamy mash for a seriously satisfying meal.

Open chicken and mushroom pie
Serves 6
1 x ready roast chicken
Break up the chicken and separate out all the pieces of meat you would like to see in your pie. If you like chicken skin, choose some good bits and cut that up smallish and add it to the chicken you are separating for your pie.
1 x roll of ready-made puff pastry, defrosted
Pre heat the oven to 220°C. Grease a baking tray and roll the pastry on to the tray.
Bake the pastry for about 15-20 minutes until golden and crispy.
For the mushroom sauce
250g of mushrooms, washed and sliced
2 Tbsp of olive oil
½ tsp of salt
½ tsp of pepper
½ tsp of cumin (optional)
½ tsp of coriander (optional)
1 Tbsp of soya sauce
4 Tbsp of flour
2 Tbsp of butter
1½ cups of milk
Heat the oil in a pan on high heat. Add the mushrooms and spices and fry until the mushrooms have reduced in size by at least half (5 – 10 minutes). If the mushrooms stick or dry out, add a dash of water to the pan. Add the soy sauce and fry for a further minute.
Remove from the heat and add the butter and flour. Stir until the butter has melted and mushrooms are coated with flour. Return to the heat and fry this for an extra minute or so. Remove from the heat again and add the milk. Stir until the milk and flour have combined before returning the pan to the heat. Stir gently until the sauce has thickened. It should be quite thick. If it is too thick, add a little extra milk.
Add the chicken, stir lightly to combine and spread it over the baked pastry.
Garnish liberally with fresh herbs, basil, thyme or parsley will work well. Serve immediately.
In praise of my favourite curry recipe!


I haven’t made this chicken curry recipe in ages but I trained it yesterday and am training it on Monday again and it is truly a must have recipe in your repertoire. First and foremost it is quick to make. I can make the whole curry in the time it takes my rice to steam. Secondly, it is light, using low fat yoghurt as the sauce base and chicken breast as the meat. And finally, it is fricken delicious!
2 Tbsp of olive oil
3 medium onions
50g of ground almonds
400g plain yogurt (or a can of coconut cream if going for a diary free option)
6 Medium chicken breasts or one pack of Fry’s vegetarian chicken style strips
3 tsp (15ml) cumin
2 tsp (10ml) coriander
2 tsp (10ml) garam marsala
2 tsp (5ml) turmeric
½ tsp (2.5ml) chilli powder (optional)
½ tsp (2.5ml) black pepper (optional)
1 ½ tsp (7.5ml) salt (or to taste)
Chopped fresh coriander to serve
Chop up and fry the onions in half the olive oil until golden brown. If the onions start to stick add a dash of water here and there to loosen the sticking. Combine with the ground almonds and yogurt and blend until smooth. It will still be slightly grainy in texture, not 100% smooth. Set aside.
Cut the chicken up into small cubes. Gently fry the spices in the remaining oil until fl
avours are released (1 or 2 minutes) and then add the chicken, frying until just cooked. Do not over cook the chicken.Add the yoghurt sauce to the chicken along with the salt and stir gently until all the flavours have combined and curry has just begun to gently simmer. Remove from heat and allow flavours to develop. Heat through just before serving.
This dish is ideally served topped with fresh chopped coriander and served with sambals. Basmati rice, Jasmine rice, rotti’s or naan are the ideal starches to serve with it.
If cooking for dinner party this dish is perfect to prepare the day before as flavours only improve over night.
For those of you who would prefer a lower fat option, use fat free yogurt. It won’t be as creamy but will still be very yummy. For those of you who don’t care – double cream Greek yogurt is awesome!
Soft and chewy chocolate chip treats


Adam has been in Joburg for a conference and is coming back late tonight. I’ve been thinking of a treat to welcome him home and know that this will have to be in pastry form… his Achilles heal.
I have come across a recipe for soft and chewy chocolate chips cookies in a recipe book I have on loan from my aunt (an inspired cook and fellow food nut) called ‘The new best recipe’ complied by the editors of Cook’s Illustrated. I love the concept of this recipe book. They take each recipe and try between 30 – 50 version of it and then vote on the best one.
I have translated the recipe into South African ingredients, measurements and temperate and the cookies are now in the oven… they smell amazing! Am very excited.
One ingredient I want to mention is the chocolate chips. I went to my favourite speciality food store, Komati foods, and they to my great delight had Callebaut chocolate drops – a far superior baking chocolate to most you can find in SA stores. I bought both the milk and dark chocolate and put half a cup of each in the cookie dough.
The cookies are out and have been tasted hot off the baking sheet. They are all that was promised in the recipe. Crispy on the edges and chewy in the centre with little pools of melted chocolate as you bite into them… seriously good. The recipe recommend eating them warm and I totally second that!
I do however have a few amendments I would make. I think they are touch too sweet and would drop the sugar content by about 25% If I try them again. I would also only use the dark chocolate chips next time. They have a far richer flavour than the milk.
I can’t wait for Adam to get home… he’s going to platz.
Soft and chewy chocolate chip cookies (with my amendments)
Makes about 20 medium cookies
200g butter, just melted (not too hot)
¾ cup of brown sugar (I have dropped this from the original recipe)
¼ cup of castor sugar (I have dropped this from the original recipe)
1 large egg, and one large egg yolk
2 tsp of vanilla essence
½ tsp of salt
1 Tbsp of fresh lemon juice (my addition – it cuts the sweetness a little)
2 cups and ¼ cup of cake flour
½ tsp of bicarbonate of soda
1 cup of dark chocolate chips (Callebaut chocolate drops are my recommendation)
Preheat the oven to 160C˚. Place one wrack at the top and one wrack in the middle of the oven. Have two large baking sheets ready.
Combine the melted butter and sugar in a mixing bowl with an electric whisk. Add the eggs, vanilla, salt and lemon juice. Add one cup of the flour, then the bicarb and then remaining flour. Combine on slowest speed. Lastly stir in the chocolate chips.
Grease the baking sheets with butter or spray and cook. Roll the dough into balls of about golf ball size and place on the baking sheet allowing about 6cm between each ball for spreading.
Place the baking sheets into the oven and bake for about 15 – 18 minutes until golden brown. Half way through baking, turn the sheets 180˚ and switch wracks, so the cookies can bake evenly.
Remove from the oven and allow the cookies to cool on the baking sheets. Remove from the baking sheets with a flat spatula and serve warm if possible. They will be just fine served cool as well and should be stored in an airtight container.


