
Lifestyle
Domestic Goddesses provides a holistic life style management service. We strive to assist you in creating a harmonious well balanced life though healthy eating habits, movements, home management, home décor and refurbishments.
We will consult with you about all your personal health and home needs and set out a program to relieve the stress of the admin responsibilities of creating a home environment that gives you respite from the stresses of living a highly functioning life.

Ever eaten a soufflé omelette?


I have left over egg whites in the fridge from making custard for my tarts this weekend and I hate throwing stuff out. My thoughts have run to an egg white soufflé omelette. It’s not as fancy as it sounds, it’s just a fluffier puffed up version of a traditional omelette.
Ever since I had the good fortune of staying at Tsala Tree Top Lodge (heaven…!) where I ate a soufflé omelette filled with wild mushrooms and gruyere cheese I have wanted to make one. Today was that day and after watching a clip on the internet on how to make one I was ever so pleased to find that it’s dead easy too! Sadly, the end result in the video was appalling. Thankfully, mine was better, a little too dark but nothing to cry about.
I decided to make a three white, one yolk soufflé omelette for breakfast and filled it with fresh herbs, tomato and garlic and served it with toasted 100% rye. Naturally one can go wild on the filling but I’m still trying to ease my tummy back to my normal eating habits. If I had had my way I would have gone with sautéed mushrooms, fresh avo, herbs and gruyere… yum!
Never the less this omelette was satisfying, delicious and pretty much guilt free. If you are curious about the health benefits of eggs, read this article – it cleared allot up for me.
http://www.lifemojo.com/lifestyle/eggs-good-or-bad-for-health-54818560
Soufflé Omelette
Serves one hearty or two light breakfasts
One ripe tomato
Fresh basil and chives
½ clove of garlic
Oil for frying
1 egg yolk
3 egg whites
(you can use two yolks and two whites if you want a normal omelette)
Salt and pepper
Chop the tomato into cubes, finely chop the garlic and herbs and have them all ready for use. Set your oven on grill and the wrack close to the top.
Using an electric beater, whip the egg whites until they have just stiffened. With a metal spoon gently stir in the yellow and season with salt and pepper.
Get a non stick pan (metal handle preferably) the correct size for the omelette you are making, about 18cm – 22cm should do well). Oil it well and heat it on a higher medium heat on the stove. Once the pan is hot, pour in the egg and with the back of a spoon flatten the omelette and shape it. If it puffs up, poke a hole in the center for the steam to escape. Try to shake the pan and lift the edges with a spatula to prevent the omelette from sticking.
After a minute or two of frying, put the pan under the grill for two minutes with the oven door open. If you have a plastic handle try to keep the handle a little way away from the grill while still having even heat on the omelette. The omelette should just be starting to colour.
Return the omelette to the stove and cook for a further minute or two. Test the omelette with your finger tips. If it is springy all the way through, it is done.
Add the filling to one half of the omelette and using a long spatula if you have one, flip the half without the filling over the filled half. Try to get as much of your spatula under the unfilled side of the omelette as possible. I find slipping it under long ways the best and then gently flipping it over.
Press it down slightly and then ease the omelette from the pan onto the plate. You can help it out with the spatula gently so as not to break it. Serve immediately.
Don’t bash it till you’ve tried it…
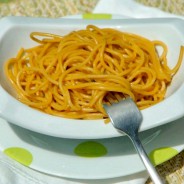

Fantastically Festive Fresh Fruit Tartlets…


Writing about food is going to be tough for me today as I have a tummy bug and am feeling rather less than enthusiastic. And that is sad as the tartlets I made with my friend this weekend deserve lyrical praise. So I will do my best.
The topic of fruit tarts has been discussed a few times since I was whisked off to Café Milano a few weeks ago for a spoiling. Their fruit tarts, amongst so many other things, are out of this world. Crazily enough we still felt the need to make our own just to see if the work warranted the taste. It was also my nephew’s birthday party on Sunday so we had the perfect excuse.
Fruit tarts are a combination of a short crust case, cream custard, fresh fruit and a light fruit glaze. The result should be crisp, creamy and tangy all in one mouth full and I think we managed to get just that. I must have eaten at least 10 while we were making them. They were so fresh, light and more’ish.
Spending the night in the fridge, they did lose some of that lovely crisp lightness and I think that in hindsight I would pre make the bases and custard but assemble the tarts just before serving.
Fresh Fruit Tarts
Makes about 50 mini tarts – perfect for a party!
For the pastry
2 cups of flour
¼ tsp of salt
100g of ground almonds
1 tsp vanilla essence
2 egg yolk
½ cup castor sugar
Rind of ½ half a lemon
1 Tbsp of lemon juice
200g butter
2 – 3 Tbsp ice water
Sift your flour into a mixing bowl. Add the salt, ground almonds, vanilla essence, egg yolks, sugar, lemon rind, squeeze of lemon juice and cold butter cut into cubes. Combine the ingredients by rubbing it between your fingers until well mixed and has formed rough crumbs. Add the iced water to the crumbs to form a dough like mixture.
If you have a food processor, follow the same instructions by blending all the ingredient together to form crumbs and add the ice water at the end to form the dough.
Roll the dough into two balls and refrigerate for an hour or two until the dough is cold.
For the custard
Makes about 500mls
1 cup (250ml) of thick cream
½ cup (250ml)of milk
1 whole egg
2 egg yolks
1 Tbsp vanilla essence or the equivalent in paste or 1 bean seeded
4 Tbsp castor sugar
A pinch of salt
1 Tbsp corn flour
Warm the milk, cream, vanilla essence and half the sugar in a heavy bottomed sauce pan. In a bowl whisk the eggs, half the sugar, salt and corn flour until it is frothy and has no lumps.
Spoon the hot milk mixture into the egg mixture gradually. Once all the milk and egg has been combined, return the mixture to the sauce pan and whisk gently while reheating. As soon as the mixture starts to thicken, remove from the heat and whisk until the thickening process has stabilised. Return to the heat and whisk until it bubbles slightly then remove from the heat and whisk again until it has stabilised.
It is now ready for use. If storing for later use, store in air tight container or cover with cling film but in a container where the custard fills the container and the cling film almost touches the custard. This prevents a skin from forming.
For the fruit
Choose fruit that can hold its shape and has a certain amount of tartness. Berry’s and tropical fruits work well. Figs and plums too. For inspiration look in google images at fruit tarts.
Making the pastry cases
The mini tarts look so elegant and dainty but if time is an issue one large tart is certainly the way to go.
Preheat your oven to 200˚ and place the wrack in the canter of the oven.
Roll your pastry out onto a floured surface and cut out circles of the correct size to fit your mould. I used a silicone mini pastry shell mould which worked like a charm and blind baked the shells using the method in this video clip:
http://www.youtube.com/watch?v=pCDeJhGWFEA
It is quicker and much less fussy.
Take a look at this clip for the traditional blind baking method:
http://www.youtube.com/watch?v=Zb0jp18Va6Q&feature=related
Use one ball of pastry at a time so as to keep your pastry cold and manageable. Roll all the left over bits of pasty into a ball and keep it the fridge, so it can cool again before reusing it.
Once the shells have been baked leave them on a wire rack to cool. Store them in air tight container out of the fridge if you are planning on using them at a later stage.
Once ready to start assembling, get your pastry shells, custard and fruit ready. Spoon the custard into the pastry shells leaving a little space in the shell for the fruit. Arrange the fruit in the desired manner and set the tarts aside on a serving platter.
I feel that glazing the tarts is not essential. In my opinion the flavour and appearance is not especially enhanced and it just add to an already time consuming process.
If however you want to glaze them…
For the glaze
Melt four table spoons of smooth berry or apricot jam with one table spoon of water and paint the fruit with a pastry fruit. The glaze should be very thin and just add glossiness to the fruit.
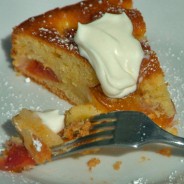
Because sometimes one just has to bake a cake.

Lemony chicken and marinated veggie salad
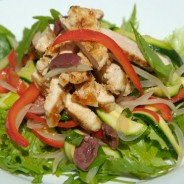

Yes, yes – I know – I am a bit hooked on these tenderized chicken fillets right now, so if you haven’t tried them yet, do! I am however not a salad fan or more exactly I am not a lettuce fan at all. Most salads I make are either lettuce free or loaded with all kinds of goodies so that the lettuce ends up being not much more than garnish.
My food consumption lately has been a little larger then usual and I’m feeling guilty. So chicken salad it is. Thank goodness this recipe is loaded with flavor and protein so I’m not going to feel deprived.
The recipe for the salad I’m making for my lunch today is posted below, but the principle can apply to any set of ingredients. Start by tenderizing and marinating your favorite kind of meat (off the bone). A light marinade would best. I would suggest a combination of some of these – oil, garlic, fresh herbs, mustard, lemon juice and zest, ginger, Indian spices, salt, pepper. Sticky sweet marinades tend to be heavy.
Finely sliver up your harder veggies and toss them with light vinegar (balsamic will discolor too much), and similar ingredients to your marinade. Leave these veggies in the fridge to draw flavor. Pan fry or grill your meat on high heat for not more than a few minutes on each side and allow it too cool before slicing.
Assemble your meat and marinated veggies on a bed of lettuce. No extra dressing should be needed. But there is no harm to put some balsamic and olive oil on the table for anyone who may want to add extra.
Cheese, nuts and seeds will add some decadence and texture to the salad too.
Lemony chicken and marinated baby marrow salad
makes one main course portion and three side salad portions
1 handful of lettuce leaves of your choice. I used a rocket salad pack from Pick n Pay.
For the chicken
1 large free range chicken breast, tenderised (see link)
1 tsp of olive oil
1 tsp of lemon juice
1 tsp of olive brine (the juice the olives come in)
¼ of a garlic clove, finely chopped
½ tsp of fresh thyme, finely chopped (¼ tsp of dried thyme)
½ tsp of fresh ginger, finely chopped
¼ tsp of salt
Add some chilli if you like a zing
Combine all the marinade ingredients and rub the tenderised breast with it. Leave this in the fridge until ready for use.
For the marinated veggies
2 baby marrows, thinly sliced
¼ red pepper, thinly sliced
¼ onion, thinly sliced and submerged in boiling water for a minute then drained
6 black olives, pitted and broken up a bit
¼ of a garlic clove, finely chopped
4 basil leaves, shredded
1 tsp of olive oil
1 Tbsp of olive brine (the juice the olives come in)
2 tsp of lemon juice
¼ tsp of salt
Combine all the ingredients in a mixing bowl and toss till they are coated in marinade. Leave this in the fridge, tossing from time to time as you think of it.
For the chicken, heat a dash of oil in a pan and get the pan searing hot. Fry the chicken for about 2 minutes on each side until cooked through and golden brown. Set the chicken aside and allow it to cool in the fridge.
Assemble the salad just before serving. I placed the salad leaves on a plate, topped this with the marinated veggies and stacked the chicken breast, which I had sliced thinly, on top.
Pizza! Need I say more…


Even grownups deserve toast soldiers
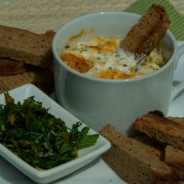

One of my favourite breakfast egg dishes are coddled eggs. I know it sounds weird as it’s a little too close to curdled but that’s not it at all. I looked up the definition in the dictionary and just loved what they wrote – “to treat with excessive indulgence”. So these are eggs which have been treated with excessive indulgence. Nice.
So for some Saturday morning coddling we had coddled eggs (see recipe below), with 100% rye bread toast soldier from Knead bakery and a pile of freshly chopped herbs from the garden. I think there is nothing excessive in this indulgence just serious goodness!
The herby mix here also warrants some elaboration. This isn’t just chopped herbs – they are herbs chopped with fresh garlic and sprinkled with a little salt, chilli and some curry powder. This fire cracker of a mixture served on top of poached eggs, in an omelette, with grilled tomatoes or over mushrooms will zing up your breakfast like nothing else! And they look fabulous too!
Now for the egg recipe:
Coddled Eggs
Two eggs per person
4 Tbsp sour cream per person
¼ of a clove of garlic per person, finely chopped
1 tsp of chopped chives per person
1 pinch of salt per person
Pre Heat your oven to 200˚. Place the wrack in the middle of the oven. Boil a kettle full of water and fill a small roasting pan with the hot water.
Mix up your sour cream, garlic, salt and chives. Spoon two table spoons at the bottom of a ramekin or tea cup. Crack in two egg and top this with another two table spoons of the sour cream mixture. Place the ramekins into the water filled roasting pan and bake for 15 – 20 minutes. You want the yolks to be runny but the egg white to have set. You can check this by breaking the surface with a knife if needed.
Serve immediately while hot. Be careful when serving to children as the ramekins are hot, you can quickly bunk the ramekin in cold water if you are concerned.
Who doesn’t love a good burger?
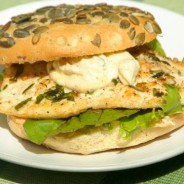

So, I’m not a saint and I do eat and enjoy fast food. Burgers are not something I eat often but when I do, I choose well. The Lamb and mint burger at Royale Eatery is one of my favourites but when ones looking for that fast food feast I am a Steers girl all the way – their chicken and cheese burgers make me week at the knees not to mention their fries!
Friday was a burger day for me but I had friend I haven’t seen in months coming for lunch so I decided to make it a little special. A few days ago I had bought some gluten free rolls (made with soya flour and pumpkin seeds) from Wellness Warehouse and thought they would make the perfect gourmet burger bun. I tenderised some Elgin free range chicken breasts and marinaded them in olive oil, garlic, rosemary and basil. While they chilled for 10 minutes, I whipped up some home-made garlic and lemon mayo. See my post on tenderising chicken breasts (http://www.domesticgoddesses.co.za/?p=285)
I say whipped up lightly as it took me about 6 minutes and that was more because I was distracted while I chatted with my friend. The drip drip method of making mayonnaise is a horror story devoted to old fashioned people who can’t move with the times. Using a stick blender and blender jar you can make mayonnaise in a few minutes. See recipe below.
I took a few spoons of the mayo I had made (the rest went into the fridge for future enjoyment) added some of the basil and rosemary I had left over from making the marinade and added about a ¼ of a tea spoon of cayenne pepper. I had toasted the buns under the grill, seared the chicken in a scorching hot pan for two minutes on each side (also great on the braai), added some baby asian leaves from a PnP pillow pack, assembled the burger added a large dollop of mayo and sat down to enjoy my catch up session. It was tender, juicy, aromatic and great quality comfort food.
Home-made garlic and lemon mayo
Makes about a cup and half of mayo
1 jumbo egg
1 cup of sunflower oil
80ml of olive oil
1 clove of garlic
1 tsp of salt
Juice of half a lemon
Zest of a ¼ lemon
Break the egg into the long blender jar provided with your stick blender and add the oil. Place the stick blender at the bottom of the jar, on high speed pull it up slowly through the egg and oil. Once you reach the top the base of you mayo is made. Plunge the blender around the jar a bit to ensure that everything has been well combined. The mixture will also thicken a bit more if you blend it for a minute longer. Then add the remaining ingredients and blend until combined. Refrigerate in an airtight container.
Phiwe and my magazine debut!
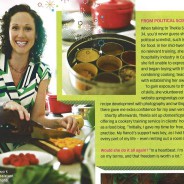

O Magazine did a write up on women who have made big career changes and I was one of the people they interviewed. The picture is a screem – I look like a 70’s house wife! But Phiwe and I had such fun being made up, dressed up and put under the spot lights.
The article is on page 101 in the March O Magazine.
I am off to make myself a tenderised chicken breast burger with home-made mayo for lunch – will see if I can squeeze in another blog post later today.
Oasis for the soul



From the moment I walked in I was enveloped with the smell of great coffee mixed with fresh pastries and a melange of goodness wafting from the kitchen. However, what struck me most, was the sense that you are being cared for when you are there. The space feels like a friend [with great taste’s] home. Where ever you look you see something personal and beautiful.
The staff are warm yet unobtrusive. The menu is simple but perfectly balanced. There is no compromise made on ingredients or suppliers. The coffee and tea served are from Origin, the oil and balsamic on the table is Willow Creek, the pesto served with my poached eggs is Pesto Princess, the chicken used is free range and it feels good knowing that you are going to be served only the best local produce.
Starlings has now become a destination for me, a place I go to when I need to feel nurtured. Today was a day like that and it was also the first time I chatted with Trish, the owner, chef, decorator, gardener, manager, cost controller, you name it. After chatting to her it is clear why Starlings is such a special place. Trish treats the restaurant like it’s her home and her customers like special guests and friends. Her staff are like family and everything she surrounds herself with is personally chosen and placed. Everything has a story and there is charm which can only be generated with time, care and passion.
If you have been before or plan to go – let me know what you think?


