Lifestyle
Domestic Goddesses provides a holistic life style management service. We strive to assist you in creating a harmonious well balanced life though healthy eating habits, movements, home management, home décor and refurbishments.
We will consult with you about all your personal health and home needs and set out a program to relieve the stress of the admin responsibilities of creating a home environment that gives you respite from the stresses of living a highly functioning life.

A very good day
My parents have let our old family house in Stellenbosch and have moved to Betty’s Bay. They are getting in a new tenant soon so they have decided to spring clean, renovate and also to pack up a lot of our personal family stuff. Before my mother was going to pack up the kitchen stuff I asked if I could quickly pop by and see if there were a few things I could use in my kitchen. Well, my quick pop through ended up being the best part of a very good day.
I arrived to a house under siege – boxes, painters, handy men and chaos but my mother and step dad in with their usual charm showed me around and told me all the plans they had and what was going to be done. They also had a little gift for me from their recent travels of a packet of Beaver Creek, estate reserve 2010 coffee and a piece of sheep’s milk pecorino from Ovis Angelica. Since I had brought with me a jar of Chaloner’s olive and chilli preserve and guava jam, I offered to pop out and get some more cheese and bread for lunch.
My parents then advised me to stop in at Mellisa’s just up the road for some more cheese and then to go to a new bakery they had heard a lot about, called De Oude Bank Bakkerij (fabulous review by Whale Cottage). So I mozied off up Dorp Street on the most heavenly of winters days. I bought two of my old favourite cheese from Dalewood and Klein River as well as some little florentines for dessert.
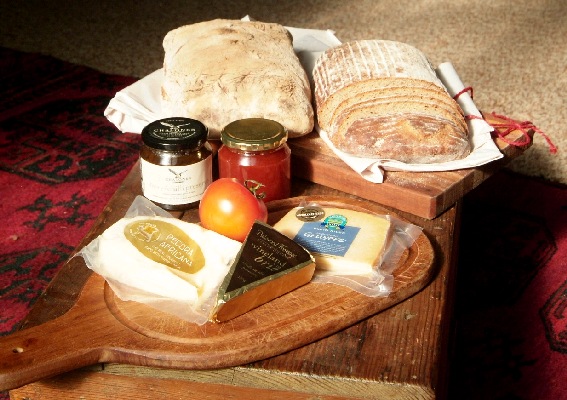

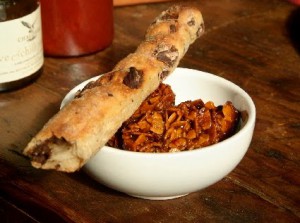
I struggled to find the bakery but finally, almost by accident, I found it tucked in the back of a set of quaint shops. It was like a little hidden treasure, bustling with people in the know and wafting with the smells of freshly baked bread and the best intentions. I had just come to buy bread but the food on the tables scattered around the café looked so enticing, I was very sad that I had to leave without being able to sit and enjoy this haven. I bought two massive loaves of dark rye and something called rustica (like ciabatta with bigger holes in the dough, as well as four bread sticks filled with chunks of dark chocolate, all wrapped in a butcher paper and tied with red twine. 10 out of 10 for atmosphere, friendliness and presentation.


I rushed home and set up a rustic lunch upstairs on an old wooden kist on the floor as every other table and space was packed up with boxes and clutter. A friend of the family had also spontaneously popped in and the five of us plus our old cat who has suddenly gained about 2kgs (I think all the neighbours have been feeding her independently) sat in a pool of winter sun and enjoyed this simple feast.

The bread was light, crusty and chewy, the cheeses were all the things an excellent gruyere and camembert should be, but the sheep’s milk pecorino was something new for me and therefor special. It was very young and soft so it had a lovely creamy texture whilst still having the strong flavour and acidity which will turn into crystals with age. The cheese paired beautifully with the olive and chilli preserve (which is sweet, savory and spicy all at the same time) and the guava jam (which has something of a likeness to quince paste but is far more fruity and floral in flavour)

The mini florentines and bread sticks with chocolate were sensational. Simple goodness.
It was now time to pillage the kitchen. I left with way more than I had bargained for, but still only a 20th of what was there… oh my word my mother had collected a lot of kitchen stuff. I am so looking forward to cooking, baking and plating my next meals… where I am going to put everything is another story all together!

Bite sized maple syrup crumpets

Recently I got a lovely big bottle of Great Northern grade A amber Maple Syrup and have been dying to use it, aside from slurping up a few teaspoons on the side. Naturally my first thoughts ran to pancakes or crumpets but I had also been dreaming about basting a pork roast or doing some sticky ribs with it. Anyway, the crumpets won this morning.
My granny often used to make us crumpets. I remember the butter and honey running off the hot crumpets all over our hands as we ate them. When I started to make them myself I experimented with making little bite sized crumpets so that you could top them and pop them into your mouth before the topping slid off. The American way of making big crumpets, stacking them and eating them with a knife and fork somehow never appealed to me. Not sure why…
Since my granny is no longer with us, I improvised a recipe which was really easy but not as good as my grannies. I think I am going to have to call my mother and see if she remembers the recipe. It could also be that my granny had this antique crumpet pan made out of heavy black iron and looked like it was transported here by ox wagon… perhaps that was what made the difference…

Crumpets
Makes about 40 bite sized crumpets
2 ½ cups of flour
4 Tbsp of castor sugar (I used 6 Tbsp of maple syrup)
2 large eggs
2 tsp (10ml) of melted butter
1 cup (250ml) of milk
2 ½ tsp of baking powder (make sure it has not expired)
½ tsp of vanilla essence (optional)
½ tsp of salt
Sift the dry ingredients together in a large bowl. Beat the eggs, milk, melted butter and vanilla essence in a separate bowl. Whisk the wet ingredients with the dry ingredients. Stir well to form a smooth batter. Leave the mixture for 30 minutes.
Fry the crumpets on medium heat in a greased pan. I found a table spoon of the mixture dropped into the hot pan was enough to make one bite sized crumpet. With a spatula carefully flip each crumpet once it starts to bubble evenly all over. Adjust the temperature of the stove if they are browning too quickly.
Serve them with maple syrup or butter and honey. Some people like nutella or jam.
Express butter chicken

One of the most popular recipes I have cooked has to be my almond yoghurt chicken curry. I think the recipe has been used by friends, family, colleagues, domestics, the families they work for and my blog readers all over the world. It is easy, quick and ridiculously tasty. But after having cooked and trained this for many years now I was looking for a something new yet similarly quick, easy and tasty but with a completely different flavour. I think I may just have found that recipe.
It is a version of Butter Chicken or Chicken Makhani, I have however simplified this as much as possible. I just made it for lunch and the whole recipe took me 15 minutes and I was developing it as I went using what I had read online as the basis.
Now I just feel guilty as Adam can’t share it with me. May have to whip up a second batch with paneer for him.

Express Butter Chicken
Serves 4
1 Tbsp of oil
1 medium onion, very finely chopped
1 clove of garlic, minced
1 Tbsp of ginger, minced
2 Tbsp of butter
1 Tsp of ground cumin
1 Tsp of ground coriander
1 Tsp of garum masala
1 Tsp of ground paprika
½ Tsp of chilli powder (or to taste)
½ Tsp of black pepper, finely ground (or to taste)
4 skinless free range chicken breasts, cut into small cubes (replace with paneer if desired)
115g of tomato paste
125ml of cream
125ml of yoghurt
1 Tsp of salt (or to taste)
On medium high heat, fry the onion in the oil until translucent but not browning. Add the spices and the butter and fry for a few minutes. Add the chicken cubes and fry for a few minutes until the chicken is almost cooked through. Add the tomato paste and cream and fry on medium heat for a further few minutes. Once the chicken has just cooked through add the salt and yoghurt and combine well.
Serve with fresh coriander, steamed rice, roti and or sambals. Can keep in the fridge for two days or will freeze beautifully.
Veggie Mac n Cheese
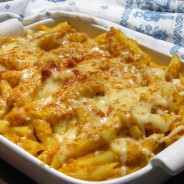
Macaroni cheese is one of those comfort food meals which when made well is hard not to love. Sticky, creamy, cheesy pasta baked until golden and crispy. Heaven, but if you make it yourself and know exactly what goes into that sublime stickiness, you would clutch your chest in anticipation for the cardiac arrest to come.
This is a dish which should be eaten with the due respect given to dishes you will only grant yourself very occasionally. As for feeding it to children as a fail safe meal… this really is the wrong flavor profile to get your kids accustomed to.
A while ago Adam told me about a pasta dish his granny used to make for them as kids. I was very intrigued as this seemed to be a ‘healthier’ alternative to Mac n Cheese, with all the sticky, creamy and cheesy notes but still full of veggies, fiber and nutritional value. A great way to disguise veggies for fussy kids as well as a comfort food meal for adults as well.

Serves 4 – 6
250g macaroni, cooked and drained
1 cup of chopped butternut, carrots and cabbage (or any other yellow, orange or white veggies)
½ an onion, chopped
¼ tsp of mild curry powder
Salt to taste
3 Tbsp of white flour
3 Tbsp of oil
300ml of milk
2 tsp of a dijon mustard
1 cup of a grated strong tasting melting cheese
½ tsp of salt
½ a cup of grated cheese
Get your pasta cooking and lightly steam the veggies putting the hardest veggies in first and the softest ones in last.
Drain the pasta and set aside until you are ready to use it. Puree the veggies with the curry powder and salt. If they are not runny enough add some water to thin the mixture. It should be the texture of a thick butternut soup.
Heat the oil and flour in a medium sized pan or pot. Allow it to fry for a few minutes while stirring the paste with a whisk. Remove it from the heat and add half the milk. Stir this with your whisk until the paste and milk have combined, then add the rest of the milk. Return this to the heat and stir it with your whisk slowly while waiting for the sauce to thicken. Take the sauce of the heat and add the mustard, cheese and salt and stir to combine.
Combine the pasta, veg puree and cheese sauce. You can serve this directly onto plates and top with the remaining cheese or place this into a casserole dish and top with the remaining cheese. Bake under the grill just before serving until the pasta has heated through and the cheese is bubbling and golden on the top.
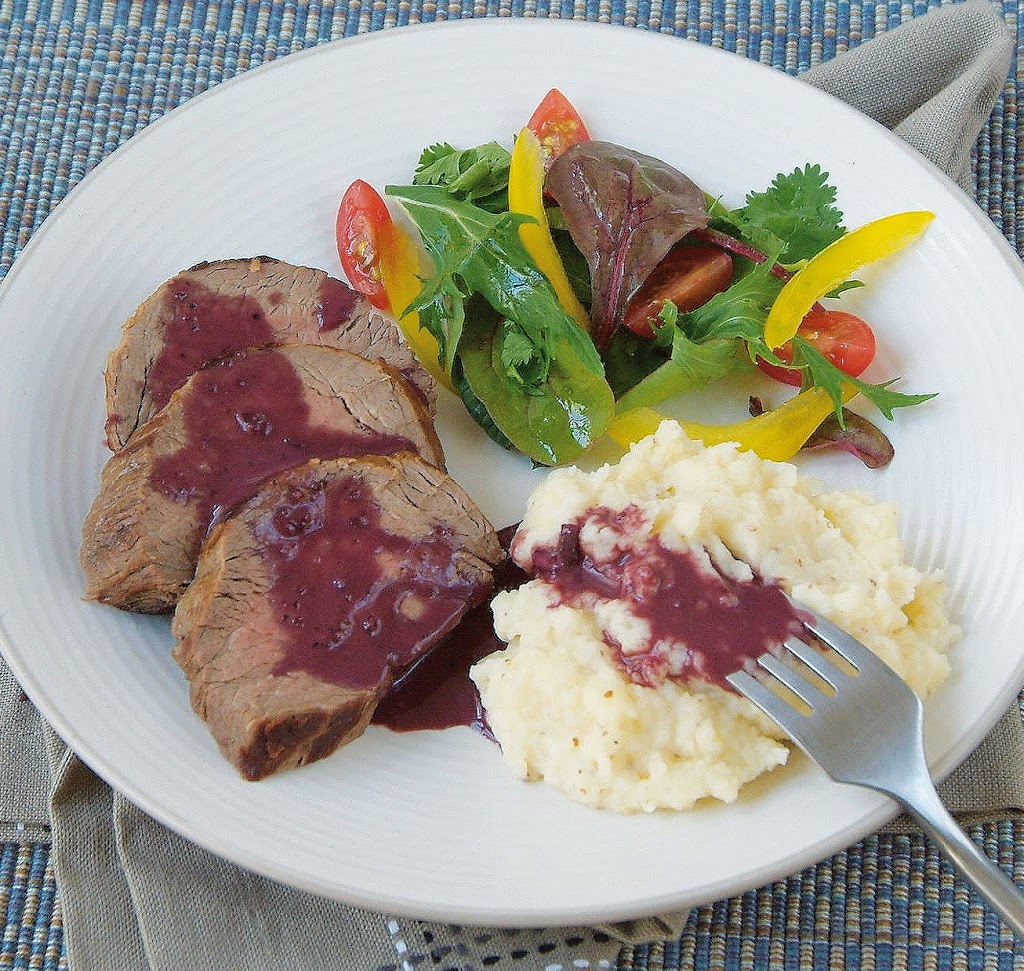
Rosemary and red wine sauce
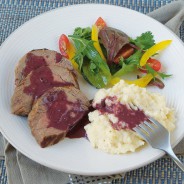
This sauce is sooooo good you just have to try it. It will blow you and any guests you might grace with it away. Add it a grilled fillet, lamb, steak, chicken, hell I’ve had guests pour it on bread and eat it just like that!
I had some left over in the fridge and added it to a mushroom risotto I was making… oh my word.
Enough said – my day is manic!
Rosemary and red wine sauce
Makes about 300ml of sauce.
½ bottle (375ml) of red wine (the better the wine the better the sauce, but nice cheap and cheerful wine is just fine)
A sprig of fresh rosemary (about 30 large leaves) roughly chopped
1 large clove of garlic, finely chopped (optional)
1 tsp of salt
2 Tbsp of sugar
2 tsp of a good mild mustard
A healthy grind of black pepper
250ml of cream
Poor the wine into a sauce pan and simmer until it has reduce to about a ¼ of it’s original volume, you want it start thickening a little.
While the wine is reducing add the garlic, rosemary, salt, sugar, mustard and black pepper.
When the sauce has thickened slightly and has reduce enough, add the cream.
You can also add your strained meat drippings to the red wine sauce and reduce it a bit further before adding the cream for a delicious savoury twang.
This sauce compliments lamb and beef especially but is also great with chicken, pork or with roast veggies or added to a risotto.
Grilled Lamb and Roast Veg Pitas
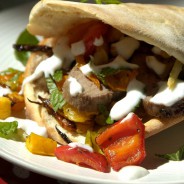
About 6 months ago I experimented for the first time with marinated rare roast lamb. I usually slow roast lamb and felt the need to try it rare. Oh my word! It was so tender and juicy I was sold immediately.
What I have done a few times since then is to rare roast deboned leg of lamb meat either on the braai or in the oven if the weather isn’t great. Then set up a table with pita’s, roast veggies and a yoghurt drizzle and let people fill their own pita’s.
It’s a great twist on a traditional braai and also great for winter when you want the braai vibe but the weather isn’t playing ball.

Grilled Lamb and Roast Veg Pitas
Serves 4 (increase quantities as needed)
400g piece of well-trimmed lamb loin or a piece of deboned leg
Juice and zest of ½ a lemon
2 Tbsp. oil
20 rosemary leaves, bruised
1 clove of garlic, peeled and chopped
125ml of plain yoghurt
6 chopped mint leaves
1/8 tsp. of cumin
1/4 tsp. of salt
8 cups of cubed roasting veggies (butternut, onion, peppers, carrots, courgettes, aubergine etc.)
1 Tbsp. oil
20 rosemary leaves
½ tsp. of salt
4 – 6 pitas depending on who might want seconds 😉
Wash the meat and pat it dry with kitchen roll. Mix together the lemon juice, zest, oil, garlic and rosemary in a container small enough to snuggly hold the meat. Coat the meat with the marinade and leave it for about 2 hours if you can (shorter is fine if you don’t have the time).

Mix up the yoghurt, mint, cumin and salt and refrigerate till ready for use.
Pre heat your oven on grill and place the rack in the centre of the oven.
Select the veggies you like to roast and dice them into pieces of about 1cm – 1.5 cm. This is so that they can easily fit into the pitas. Combine the veggies with the oil, salt and rosemary, in a bowl, tossing them until they are covered with oil. Spread them out onto a baking tray and place them in the oven. They should take about 15 minutes to roast. Every 5 minutes or so, check them to see that they are not blackening too much and turn them with a spatula if they are. Remove them from the oven and set aside.
If you are not braai’ing the lamb, get the oven as hot as possible and on grill. Move the rack as close to the element on top but naturally not so that the meat touches it. Remove the meat from the marinade and place on a baking tray in the oven. The meat should need about 7 – 8 minutes per side for a 400g piece of meat if the oven is at the correct temperature i.e. scorching hot. You need to turn the meat so it grills on both sides. The lamb is best served medium rare. Up the cooking time by two minutes per side if you prefer it well done. Remove the meat and let it rest for 5 minutes before slicing. Lightly salt the lamb after slicing.
Toast the pitas in the oven until they puff up. Slice a hole about 1/3 of the way along the edge of the pita and with the knife loosen the inside creating a pocket. Layer roast veggies, yoghurt sauce and lamb evenly in the pita and serve immediately.
Delighted by Diletto

Shopping is an activity I can enjoy for about 45 minutes at a stretch tops. After that I become restless, irritable and eventually downright irrational. The idea of online shopping has never appealed to me as I like to pick things up, read the label, feel the cloth, try it on – a full sensory experience which online shopping doesn’t afford you. That was until Annika @anysroad met Martin from Diletto at the Hope Street market where they have a stall. She then passed on their details to me and I went onto their site to check it out – to my delight it is full of the products and suppliers I love and use – no selling needed.
They are an online deli with a personally sourced range of premium products from small scale or premium producers mostly in the Western Cape region. A lot of these products are available at delis, markets and speciality stores but you usually have to venture further than your regular supermarket to find them, especially if you don’t live in the Cape. I live in Obz and am a Pick n Pay girl but sadly my Pick n Pay doesn’t stock a lot of the speciality or premium brands I like and being the lazy bones I am, I’m not likely to mission around to find them.
Problem solved with Diletto. Last week Monday I went online and with ease (I’m not that tech savvy) I ordered some Vanilla Man vanilla extract, Jack Black beer, So!Go caramel fudge sauce (oh my word, have eaten most of it straight from the jar already!), Origin Coffee and Tokara Frontoio Olive Oil. My order was processed and a day later they contacted me to ask me where I would like my parcel delivered. Obz falls into the city bowl area, so my delivery was free! R50 delivery charge to anywhere in South Africa – I think this is fabulous news for my joburg readers!
I promptly baked an Italian vanilla cake, have been waking up to fabulous coffee, enjoyed Adam’s favorite beer with him at home and oh that caramel fudge sauce… an ode should be written for that sauce! All this without leaving the house! I like it!


Beef in Black Bean Sauce Stir Fry
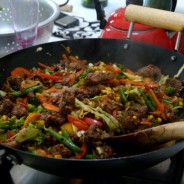
Adam and I are house sitting my sister’s home while they are away for the holidays. To celebrate having an extended living space we invited some of our friends around to enjoyed a lazy decadent winter afternoon. I made Vietnamese spring rolls to snack on while everyone arrived and settled in, and a beef in black bean sauce stir fry for lunch. I had bought some So!Go caramel fudge sauce to drizzle over ice cream if anyone had room but instead Adam found my sisters stash of sweets… (I have now hidden them)!
I will write more about the spring rolls later this week as the rolling method has a few tricks to it and I want to work on some more ‘how to’ material so you don’t have to have as much error in your trials as I did… The beef in black bean sauce however, was such a success and is so easy.
For reasons not that clear to me, I tend not to cook stir fries but I recently had two clients requesting that I train their housekeepers to make stir fries and both recipes were delicious. The one recipe I trained which I found the most appealing was the stir fry with black bean sauce as unlike many other Asian sauces it seems to have more food value and depth of taste.
The Asian supermarket round the corner from me sells two kinds, one with chilli (not that hot and totally delicious) and another with garlic (better suited for kids as it’s not hot). If you buy a pillow pack of pre chopped stir fry veggies this dish should take you no longer the 15 minutes to prepare and tastes fabulous!

Beef in black bean sauce stir fry
Serves 6 – 8
2 cups of basmati rice
6 Tbsp black bean sauce
4 Tbsp soy sauce
2 tsp brown sugar
1 tsp black pepper
2 cloves of garlic, minced
2 tsp finely grated fresh ginger
2 Tbsp peanut or olive oil
600g of beef fillet, cut into thin strips along the grain
24 green beans, ends trimmed, cut in half on the diagonal
1 red bell pepper, julienned
1 small head of broccoli, cut into florets
1 onion, each cut into 8 wedges and separated into pieces
1 cup of strong beef stock
1 Tbsp of cornstarch, mixed with 3 Tbsp of water
Bring 3 cups of water to a boil in a medium sized pot. Stir in the rice and keep stirring until the water returns to a boil. Allow the rice to boil until the water reaches the same level as the rice. Cover the pot with a tight-fitting lid and turn off the heat. Allow the rice to steam for 15 minutes. Fluff up the rice with two forks once ready to serve.

While the rice cooks, mix together the black bean sauce, soy sauce, sugar, black pepper, garlic and ginger in a bowl. Heat a wok or large skillet over high heat, add 1 tablespoons of the oil, and stir-fry the beef for 2 minutes, add half the black bean sauce and stir fry for a few more minutes. Remove the beef from the wok and set aside on a plate.
Heat the remaining oil in the wok and stir-fry veggies for a few minutes. Return the beef to the wok. Add the remaining sauce mixture, stock and cornstarch paste and cook, stirring continuously, until thickened. The veggies should still be al dente (a bit crispy).
Serve on a bed of the rice.
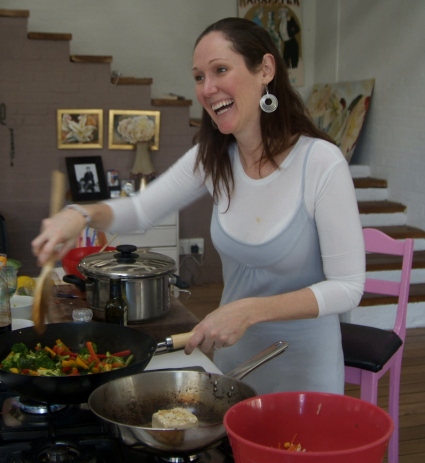
An OMW salad experience!
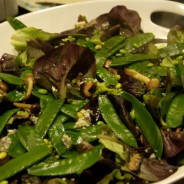
Last night we celebrated a friend’s birthday. Each person brought or prepared a part of the meal. I brought the cake and a potato bake. My dear friend Annika @anysroad made a salad…. (moment of silence) oh my word, what a salad!
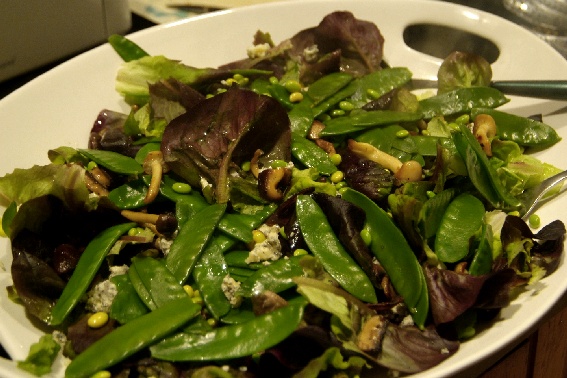
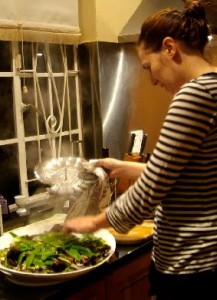
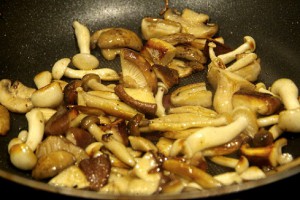
It was a butter lettuce, basil and rocket combo pack, crumbled blue cheese, steamed edamame beans and mangetout peas and pan fried exotic mushrooms (also a combo pack from woollies). It was light and fresh but at the same time substantial and wintery! Somebody else whipped up a light vinaigrette and the rest was salad history.
This whole ensemble was gathered around grilled fillet and sirloin and copious amounts of red wine. A very good evening indeed!

Vanilla, berries and birthdays!

I was very excited to have three good excuses to bake one of my favourite cakes today. We are celebrating the birthday of a friend, I just bought a bottle of Vanilla Man’s vanilla extract and I finally have a jar of Chaloner’s raspberry and vanilla jam. That all spells Italian vanilla cake filled with raspberry jam and soft whipped cream. Simple goodness.
The original recipe comes from an Italian recipe book of my mothers, which had raspberry jam and mascarpone cheese inside. I have made it as a plain dry cake; filled with fresh macerated berries; as cup cakes with a simple butter icing and I imagine that cream and granadilla pulp would also be great or a banana caramel cream centre… in other words, this cake is the perfect base for your favourite fillings and toppings.

Vanilla Sponge Cake
250g Butter, just melted but not oily
250g (1 ¼ cups) castor sugar
4 large eggs
1tsp vanilla extract
225g (1 ½ cups) cake flour
25g (2 Tbsp) corn flour
2 tsp baking powder
Squeeze of lemon juice
Heat the oven to 180 degrees and place the rack in the middle of the oven.
Whisk the melted butter and sugar until light and fluffy, slowly beat in the eggs, vanilla and lemon. Gradually sift in the flour, corn flour and baking powder.
For a cake – Butter a 25cm shallow round cake tin. Pour into the tin and bake until golden and springy for about 20 – 25 minutes.
Remove from the tin when cooled.
You can serve this cake plain dusted with icing sugar. I like to halve the cake and fill it with sugared mashed up berries, soft whipped cream and dusted with icing sugar.
For cupcakes – place cup cake papers into the appropriate sized muffin tin. Fill each cup cake paper 2/3 of the way allowing room for rising. Bake until golden and springy, about 10 – 15 minutes depending on the size cup cakes you have chosen. The mixture should make about 20 – 24 medium cup cakes.
Tip the cup cakes out of the tin and place on a rack to cool. The tin is then ready for reusing if you don’t have enough muffin tins for the full recipe.
Make a simple butter icing by blending together 150g of butter, 300g icing sugar and two tablespoons of milk. Divide the icing into as many bowls as colours of food colouring you have. Add a few drops of food colouring to each bowl and mix thoroughly. Keep adding drops of food colouring until you get the desired colour intensity.
Wait until cup cakes are fully cooled before icing. To speed this up, put them in the fridge or freezer for a few minutes.
For very young kids it’s better to do the icing yourself and let them do the decorating. Else you’re in for mess central.


