Lifestyle
Domestic Goddesses provides a holistic life style management service. We strive to assist you in creating a harmonious well balanced life though healthy eating habits, movements, home management, home décor and refurbishments.
We will consult with you about all your personal health and home needs and set out a program to relieve the stress of the admin responsibilities of creating a home environment that gives you respite from the stresses of living a highly functioning life.

Luscious Laksa!

Adam’s mum was recently out visiting from Australia and one of the heap of fabulous gifts she brought with was a vegetarian Laksa paste. When she was out here last she had wanted to make us a Laksa, which they often eat in Australia, but couldn’t find a shrimp paste free one (if you didn’t already know, Adam is vegetarian). Laksa is, at the risk of over simplifying, an Asian spicy coconut soup which usually has rice noodle, seafood and veggies in it. I believe that there is a coconut milk free version called Asam Laksa which I am keen to try next.
The Laksa we had for dinner last night was a vegetarian Laksa with shitake mushrooms and tofu as the protein element and was delicious! I read quite a few recipes and then just winged it. The result was a creamy, spicy, goodie filled soup which was a full meal on its own. I was very happy with my addition of the shitake mushrooms, which I had bought dried and rehydrated. They added a fabulous savoury taste and their texture was great.
What I found so special about this paste was that it was a one stop paste. I didn’t need to add any other flavourants. It was simply the paste, coconut milk and water to create the perfect flavoured soup base – adding whatever ‘goodies’ I wanted to after that. That said, this paste was bought in Australia and I have not tried a local brand yet. I would be grateful to anyone who can tell me what their favourite local brand is?

Vegetarian Laksa
Serves 4
15g of dried shitake mushrooms
250ml of hot water
1 Tbsp oil
3 Tbsp vegetarian Laksa paste (I used 4 Tbsp and it was a little too hot)
400ml of coconut milk
500ml of water
2 Tbsp of fresh lemon or lime juice (optional)
1 – 2 cups of veggies of your choice cut into thin strips – I used carrot, red peppers and bean sprouts
75g of dry vermicelli rice noodles
Tofu cut into dice sized squares
Spring onions
Soak the mushrooms in the 250ml of hot water, for half an hour. Heat the oil in a thick bottomed pot and gently fry the paste for a few minutes. Add the coconut milk, water and lemon juice and bring to a light simmer. Add the mushrooms and the water they were soaking in, the veggies, the vermicelli noodles and allow that to cook for a few minutes. Once the noodles are just starting to go soft add the tofu and allow the soup to cook for a few more minutes on a very low simmer. Add the thinly sliced spring onions just before serving or as garnish.
One of life’s simple pleasures made with care.

There are some simple pleasures in life which never fail to hit the spot. For me, a home-made pan fried grilled cheese, onion and tomato sandwich on brown bread with mayo and tomato sauce is defiantly one of those things! Now, I’m not one to scoff at a good old snackwich or jaffle either but my granny always used to make pan friend toasted sandwiches and it just tastes right to me.
I have a few little secrets which I think make for the perfect grilled cheese. Firstly, you need to lightly toast the bread you are going to use. Then spread butter evenly over the toast and lay it butter down on a chopping board. The butter will be on the outside of the sandwich. I like to put mayo, tomato sauce, pesto or chutney on the inside of my sandwich. Then I layer my cheese, onion and tomato (and salt my tomato slightly). I close the sandwich and put it with the cheese side closest to the bottom, in a pan on medium heat. The pan doesn’t need to be oiled as you have buttered the bread on the outside.
It is important that the sandwich fries slowly as you want to heat the sandwich through, melting the cheese before the bread burns. Once the one side is nicely browned and crisp, carefully turn over the sandwich with a spatula, and ensure that the sandwich doesn’t come apart. Then fry until the second side is browned and crisp. At this stage the cheese should be melting. Cut up and enjoy….
These come with a warning – they are totally addictive!

Artichokes – A life long love affair!
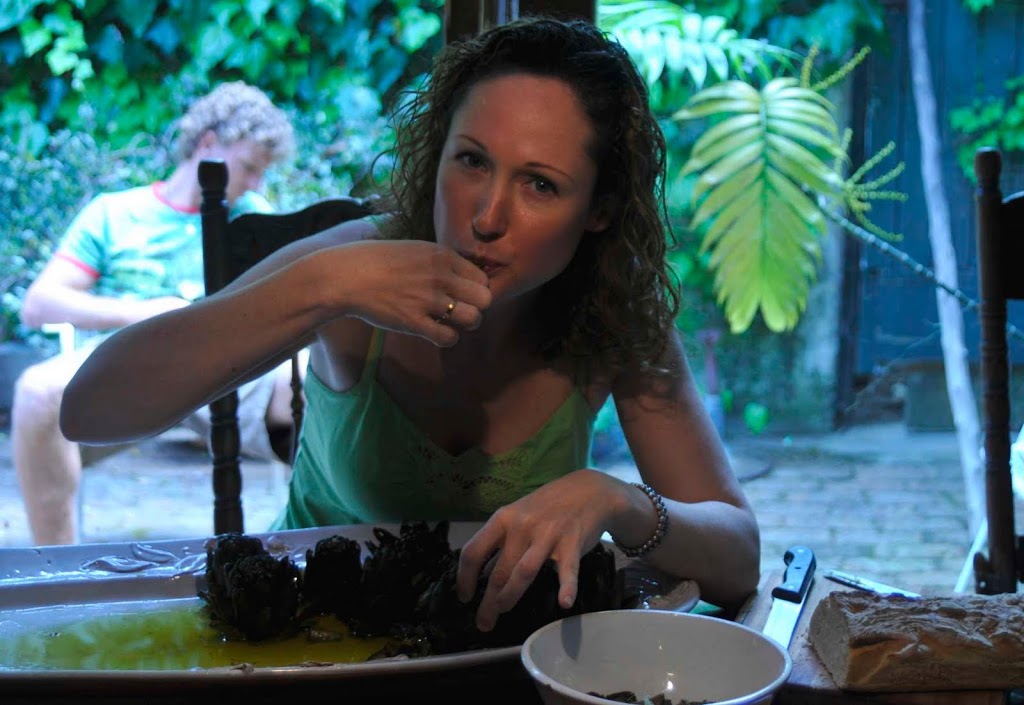
My love affair with artichokes is so well known by my family and friends that for my 21st birthday my mother painted me a painting of artichokes which now hangs in my lounge. The picture below was taken after lunch one day, when I decided to take a seat with the left over artichokes and make my way through a few more for dessert.
On Saturday I was planning a belated birthday dinner for a friend and popped into fruit and veg to see what was fresh and good. To my sheer delight they had a batch of beautiful artichokes, unusual at this time of year as they are a spring flower.
The traditional way of preparing artichokes by steaming them and serving them with mayonnaise or lemon butter does not suit me at all. I feel it dumbs down the intensity of the flavour and masks the subtleties of the aroma. The recipe which I always use is one I learned from my mother and is truly the most exceptional and simple way to prepare this amazing vegetable.
Select between one and two artichokes per person (I can eat four comfortably…) wash them thoroughly and trim the stalks flush with the base of the flower. You can also trim the stalks and cook them too if they are not too old or woody.
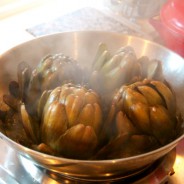
Place the artichokes into a thick bottomed pot, base down, flower up. Choose a pot which is just the right size so that they all fit snugly into the pot. They should not be able to wobble around. Sprinkle about ½ a tsp of salt over each artichoke so that the salt can trickle between the leaves. Pour a lot of good olive oil over the artichokes so that it runs through the flower and the bottom of the pot is well covered (about 1 – 3 Tbsp per artichoke). I usually go to town on the oil as the left over oil, after cooking, is beautifully infused with artichoke flavour and salt and is simply delicious.
Pour about 2 cm of water into the pot and cook over medium heat with the lid on. Cooking can take a good 30 to 45 minutes depending on the size and density of the flowers. Check if the artichokes are done by gently tugging on a leaf. If it comes away easily, they are done. For the best result all the water should have cooked away and the artichokes should fry for a while caramelizing the flesh underneath a little. However if all the water has cooked away before the flesh is soft and nutty, add a little more water and carry on cooking. Once done, remove from the heat and allow the artichokes to cool. They can be served warm or cold.
Serve the artichokes in the pot so as to allow you and your guests to use the oil in the pot to dip the leaves and heart into. Alternatively arrange on a platter and decant all the oil (scrape the bottom…) into a bowl for dipping. Serve this with crusty bread which you should use to mop up the oil.
This dish can also be quite a sensual meal to prepare for two as it is accompanied with lots of sucking and licking and sighs of delight as you eat this amazing dish.
PS – if you are not sure how to correctly eat an artichoke, click here for a step by step video clip.

The things you find in other peoples kitchens!
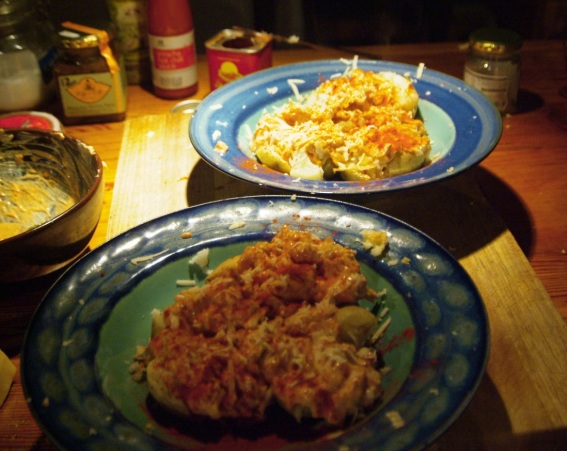
As I write today I am sitting on a fluffy rug in front of a crackling fireplace in our family holiday home out in Betty’s Bay. It has been cold and rainy and the perfect place for a lazy winter getaway. We decided quite spontaneously to make a long weekend out of the holiday on Thursday, grabbed a few fresh things from our fridge and headed out. My mother stocks the house pretty well so we knew we could rely on a having interesting dry goods and spices there.
I really have just been vegging out here and Adam has been doing pretty much all of the cooking. He is a fabulous cook and manages to chuck together meals, somewhat unceremoniously, but they always taste fantastic. I can’t tell you the recipes as I was in the lounge chilling while he was cooking but I can share with you two discoveries we have made since being here. Porcini stock paste and Sriracha sauce!

The porcini stock paste is a German product my parents must have gotten a relative or friend to bring for them, but it is now on my must have list! To any of my German readers, I will love you forever if you can send me some, or if anyone knows if one can find this product in SA anywhere please let me know. Adam used this heavenly porcini paste as the stock base for a soup with fresh veggies and chickpeas. It was sublime!

The second discovery was made late last night when, after a few too many glasses of bubbly and whisky, we decided to have a midnight feast. This entailed baked baby potatoes topped with sour cream, loads of Sriracha sauce, smoked paprika and grated ementhaler cheese. The Sriracha sauceis a sweetish chilli and garlic sauce combo and is sensational and ridiculously moreish. Off to get some as soon as we hit Cape Town.
We sadly have to head home today but have loads more culinary adventures ahead of us this weekend, which are good consolation.
Long journey to Palak Paneer!
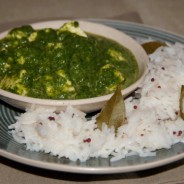
On Monday we had Palak paneer for dinner. For those of you who are not that familiar with Indian food, paneer is an Indian soft white cheese and palak is a spinach sauce. This dish has been the culmination of weeks of yearning, planning, prepping and finally cooking and eating. Ultimately it is a really simple dish and is one of my favourite dishes at Eastern Bazaar, but I really felt liking cooking it myself and was on the hunt for a source where I could buy fresh paneer. After sending out a request for info on Facebook and Twitter I got such an overwhelming response of people telling me how easy it was to make, I would have felt like a sissy not attempting it.
Well I did and it was easy but quite time consuming. If you want to see a step for step method of how to make your own paneer, click here. I did however receive a contact from a friend for Govindas Pure Vegetarian Cafe in Rondebosch, where you can buy it fresh. I just called there to verify this and spoke to the manageress, Lee-anne, who was incredibly helpful and friendly. She has given me her cell phone number for anyone who might want to buy paneer. You need to give them 48 hours notice and they will make it up fresh to order. Call Lee-anne on 074 134 2585 to place an order. I am now dying to go the restaurant to check it out.
Anyway, once I had the cheese, the sauce was super quick and easy, the rice I steamed with curry leaves and mustard seeds and it all made for a fabulous meal! I haven’t personally seen this sauce used with meat dishes but I think that it would taste great with cubed chicken breast or over tandoori chicken pieces too.

Palak Paneer
Serves 4
1 Tbsp of oil
1 large onion
2 cloves of garlic
1 tsp of garam masala
½ tsp of cumin
½ tsp of chilli powder (or to taste)
½ tsp of black pepper (or to taste)
½ tsp of salt
400g of spinach, well washed
200g of paneer, cut into bite size cubes
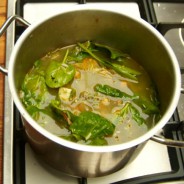
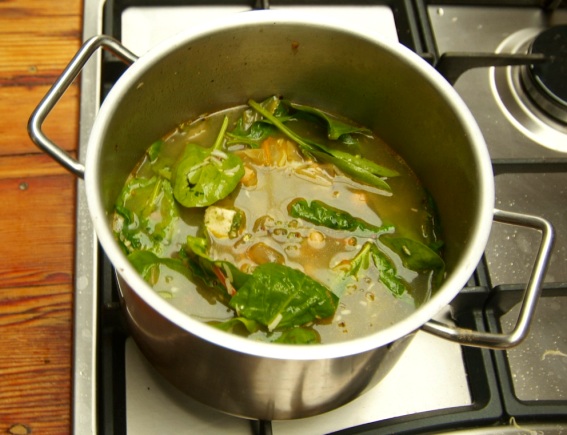
Fry the onions and garlic on medium high heat until they go translucent. Add the spices and fry for a minute or two. Add the spinach and fry that until it starts to wilt. Turn down the heat to low and put on the lid of the pot. Allow this to steam for a few minutes until the spinach is cooked but still bright green in colour. Blend this into a fine sauce, add water if it is too thick.
Add the paneer cubes and allow to cook on a very low simmer for a further 10 minutes or so. As with most curries they usually taste better on the second day, so it is great if you want to pre prepare this dish.
Serve this with steamed rice, roti, papadums, raita and sambals for a festive meal.
Wellington Weekend

This weekend I made a Beef Wellington for the first time with my beloved Annika (@anysroad). I usually don’t cook fiddly high maintenance food but this was a special request from Annika as she wanted to do a little cooking video for her Dad and thought he would love to see a Wellington in action.
This needs a little further explanation, as Annika is putting together the most amazing present for her Dad’s birthday. She has created a blog for him and is collecting stories from his past, from his friends and family and on topics she knows would interest him and is going to post these blogs every so often for the entire year after his birthday, for him to read and enjoy. I think that is such an amazingly thoughtful and creative idea! So, how could I refuse a request linked to such an amazing gift.
For those of you who don’t know what a Beef Wellington is, it’s fillet covered with goose liver pâté and finely chopped mushrooms wrapped in prosciutto and then in puff pastry and baked. We opted for a slightly more cost effective version and used chicken liver pâté and bacon.
This may sound like complete over kill in terms of flavours but each flavour compliments the other and for a special occasion it just sets itself apart as being something extraordinary. We added crispy baked potatoes and a massive salad and enjoyed this meal with family and friends. It was terrific!
I was surprised at how easy the dish actually was and by making up the main part of the meal the night before and only doing the finishing touches the next day, it really was not the production I had expected it to be. Read through the recipe thoroughly, make sure you have everything and do a little planning before you start. This will ensure that everything works out perfectly.

Beef Wellington
Serves 6 generous portions
1kg beef fillet, well trimmed. The thinner side of the fillet is best for this dish.
2 Tbsp of butter
250g mushrooms (button, brown or black are good), washed
½ tsp of thyme
½ tsp of salt
½ tsp of cumin (optional)
½ tsp of smoked paprika (optional)
½ a cup of white wine
1 Tbsp of soya sauce
125g chicken liver pâté
250g streaky bacon strips
500g puff pastry, defrosted but still cool and firm
1 egg, well whisked up with a fork
Pre-heat your oven to 220C° with the fan on and place the rack in the middle of the oven. Pat the fillet dry of any excess blood and rub it with a little oil and black pepper. Lay it on a baking tray and roast it for about 15 – 25 minutes depending on the desired done’ness. It will be baked again at a later stage, so it should only be half way cooked to the desired end result. Rest the fillet in the fridge to cool down.
Finely chop the mushrooms until they resemble rough bread crumbs. Fry them in the butter, adding the seasoning, wine and soya sauce. Fry this until the moisture has evaporated and the mushrooms have formed a thick paste. Set this aside to cool.
On flat surface lay two sheets of cling wrap about 10cms longer than the fillet, over lapping a bit, next to each other. Lay the strips of bacon length ways across the join so that the row of bacon strips is slightly longer than the fillet itself. Spread the mushrooms over the bacon in a thin layer.
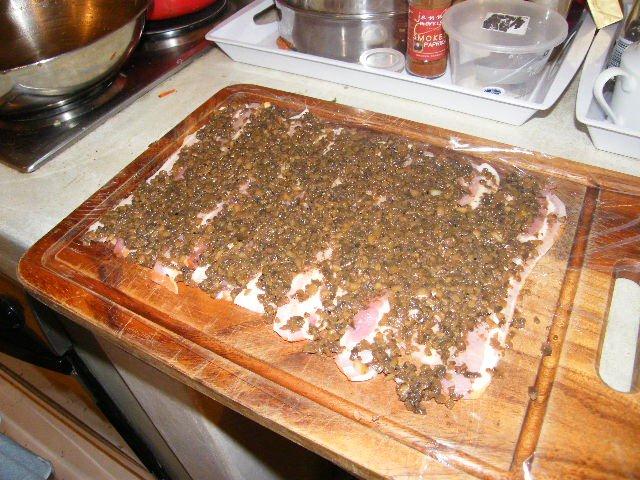
Spread the chicken liver pâté over the cooled fillet with a butter knife. Place the fillet along the long edge of the bacon. Using the cling wrap to lift and roll, wrap the fillet in the bacon, seal the cling wrap and twist the ends to create a tight wrapping around the fillet. Leave this in the fridge to cool completely.
Roll out your defrosted puff pastry on a floured surface. Roll it out large enough that the width can wrap around the fillet with a small over lap and that the ends can be pinched closed and trimmed if necessary.
Unwrap the fillet and paint it with the egg wash. Lay the base of the fillet half way over over the edge of long side of the pastry. Roll the fillet in the pastry and gently press closed the join. Pinch closed the ends and trim.
You can now immediately bake this or you can rest it in the fridge further until ready for use.
Pre-heat your oven to 220C° with the fan on and place the rack in the middle of the oven. Paint the pastry with the remaining egg wash and bake on a baking tray for 15 – 25 minutes depending on the desired done’ness and until the pastry is golden and crispy.
Rest for a few minutes before slicing.

My remedy for a horrible Monday… so far at least.

Earlier today I had just finished writings todays blog and recipe about the fantastic Beef Wellington we made this weekend and for reasons which are beyond my comprehension I have lost all trace of it… deep breath. After a short spell of cursing, I realised that I hadn’t had lunch yet and that this would calm me down so I could think clearly before deciding what to do next.
I had a beautifully ripe avo and decided that that would make the perfect comfort food lunch. I mixed up a dressing of lemon juice, olive oil, garlic, black pepper, salt and a pinch of sugar. Then I boiled an egg which I chopped up, along with some red onion and red pepper and mixed it all together.
I toased some whole wheat bread, filled the holes of the avo with the dressing and sat down to enjoy my lunch in the winter sun. I like lots of dressing and add more as I’m eating.
My mom used to make this as a starter for winter meals or just like I did today as a light lunch.
The filling can take numerous forms. Simply lemon juice, salt and pepper or the good old traditional shrimp and seafood mayonnaise, which seems to have had a revival since the 70’s. What ever way your favorite way to dress an avo is, it is a fruit which deserves center stage and this is my favorite way to do it.
I will attempt to rewrite the Wellington blog tomorrow!

Olivia’s pizza party!

I’m not going to dwell on this, but my computer is on the fritz and I’m working off of Adam’s and I don’t have the things (like my photo library or editor or word) that make it easy for me to blog… I’m not the most computer literate creature and it freaks me out when things aren’t where they are supposed to be. So I am not going to get too creative today, as I need to retain what little is left of my sanity and spend it on cooking the paneer I made this week and researching the Beef Wellington @Anysroad and I are planning on making this weekend!
On Wednesday we had a little pre-birthday dinner party for my niece, Olivia, and her request was pizza! I was only too delighted to oblige as I love pizza and making it with my family and all the kids too help is even more fun. We made about 8 pizza’s and each child (and a few of the adults) took turns to top the pizza with their favorite toppings. Each pizza was then sliced up and shared amongst us all! What a feast!
I have blogged about how to make pizza before, so if you are keen to give it a whirl – take a look at this post:
http://www.domesticgoddesses.co.za/?p=257
To make a sociable event out of a pizza evening, pre chop up lots of toppings and put them in bowls so that people can come and create their own pizza, but then share that pizza with everyone as it will be a staggered process.
Getting the kids involved is also so much fun, they can really get hands on and creative!


Touched…

Not feeling 100s today and don’t really feel like cooking or eating (shock and horror!), but I do feel like sharing a story which has really touched me. Yesterday I received a parcel from a family friend, who moved to England at least 15 years ago. When I was doing a brief stint in London about 13 years ago, Theresa was my safe place. I would go spend time with her when I needed to feel held and heard. She would prepare a lovely meal and we would talk for hours.
One meal I remember vividly, as at the time this was totally revolutionary to me. She had baked a dish of tomatoes still on the vine, each draped with an anchovy fillet, scattered with a handful of capers and drizzled with olive oil. We ate this with crusty ciabatta bread and I was in heaven. Sadly, as these things go, we have lost touch and it was with such surprise and delight that I received a parcel from her yesterday with a beautiful card and letter.
She has been following my blog from afar and wanted to share a book with me from, Molly Wizenberg, the author of one of her favourite blogs called, Orangette. I naturally skipped straight to the blog and have been paging through the book, A Homemade Life, and browsing through her blog and am simply enchanted.
I have been getting that same safe, warm, happy feeling while ready Molly Wizenbergs words as when I used to stay with Theresa. I can’t wait to get stuck into the book properly and start experimenting with some of Molly’s recipes.
Thank you Theresa for all you did for me back then and for the kind words in your letter and this beautiful book! You’re a such a special person!

Bacon, herb and butter bean soup

I bought dried butter beans the other day and every time I saw the packet I was a bit perplexed as to what to do with them. So on Monday I soaked and cooked them, on Tuesday I pureed them and added pesto and herb salt, but it still wasn’t there yet. Today I fried up some streaky bacon, added that and viola – it had arrived! Yum, it was supposed to be my lunch but I slurped it up at 11h00 already…
I was at Fruit and Veg on Roeland Street this morning and found Natural beech wood smoked streaky bacon from Joostenburg butchery. I LOVE Joostenburg pork butchery and am overjoyed that one can get their products at Fruit and Veg. If you are ever going out Stellenbosch or Paarl way – be sure and make a turn past Joostenburg. It also has a fabulous deli attached to its pork butchery too!
Okay, well there isn’t really much more to say about this recipe other than, beans are good for you, herbs are good for you and bacon makes everything taste amazing. Done.

Bacon, herb and butterbean soup
Makes about 3 litres of soup
1 Tbsp of oil
1 onion, peeled and finely chopped
1 clove of garlic, peeled and finely chopped
500g packet of dried butter beans, soaked and cooked (or 4 x 400g tins of butterbeans drained)
2 litres of water
2 tsp of herb salt (or 1 and a ½ tsp of salt with 1 tsp of finely chopped sage and rosemary)
4 Tbsp of basil pesto
½ tsp of freshly ground black pepper
1 Tbsp of finely chopped sage (extra for garnish if desired)
250g of streaky bacon, roughly chopped (use Macon if you don’t do bacon!)
Heat the oil in a pot large enough to hold all the soup, gently fry the onion and garlic until golden. Add the cooked beans and water and allow to heat through. Puree this in the pot with a stick blender until smooth. Add the herb salt, pesto, pepper and sage. Take off the heat.
Fry the bacon until crispy and reserve some for garnish if you want to, add the rest into the soup. Add the drippings from the pan too as they have a lot of flavour. Stir and allow the soup to heat through and let all the flavours combine.
Serve garnished with sage and bacon bits.
You could finish the soup with some cream to make the end result silkier but it is not essential.


