Lifestyle
Domestic Goddesses provides a holistic life style management service. We strive to assist you in creating a harmonious well balanced life though healthy eating habits, movements, home management, home décor and refurbishments.
We will consult with you about all your personal health and home needs and set out a program to relieve the stress of the admin responsibilities of creating a home environment that gives you respite from the stresses of living a highly functioning life.

Quick dinner for friends

Last week Adam and I managed to arrange two dinners which clashed with each other, so I was going to be out for dinner on the night he had invited friend around. He was also going to be working late that night, so wouldn’t have time to cook without stressing for the guests he was getting at our place.
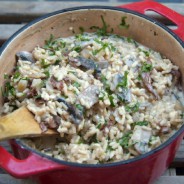
So, I earned myself a few brownie points by cooking his dinner for him before leaving for mine! It really wasn’t that hectic as I chose my fool proof mushroom risotto and a light and colorful summer salad to go with it. I had some of my oat and nut bars left over which they had for dessert. I had a happy husband and he had happy guests!
My dinner out was fabulous, but I sadly didn’t take any photos. The recipes were all first attempts of mine and will most certainly be recreated for your benefit!

Mushroom (and Bacon) Risotto
Super quick cereal bars

This morning a friend of mine sent me a link to a recipe for cereal bars. The recipes was so simple and I had all the ingredients at home, so I whipped up a batch immediately! Naturally I adjusted it here and there to suit my needs and tastes, but essentially it’s almost the same!
My only regret is that I have now eaten 8 squares and am not hungry for my very healthy lunch which is waiting for me… I totally deserve these thighs of mine!
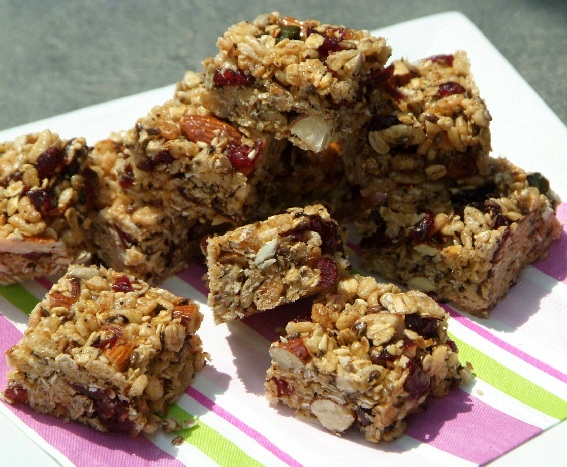

So with my over eaters remorse I started packaging them into cute gift packs. I feel much better now!
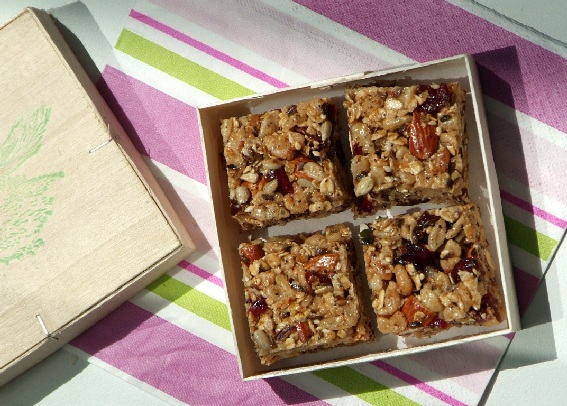
Cereal bars
Makes about 40 – 3cm x 3cm x 2cm squares (I’m guessing I didn’t measure them ;-))
½ a cup of nut butter (peanut, almond – I used cashew)
½ a cup of honey (use golden syrup for a cheaper option)
½ a cup of chopped nuts (use your favourite, I used raw almonds), roasted
½ a cup of omega mix seeds (sesame, sunflower, flax, pumpkin etc.), roasted
1 cup of oats (rolled or plain jungle oats), roasted
1 cup of rice crispies
¾ cup of dried cranberries (raisins, or your favourite dried fruit chopped up are also fine)
1 tsp of vanilla essence
1 pinch of salt
In a pan on medium heat dry roast the nuts, seeds and oats – keep a sharp eye on these as they can burn easily. Melt the honey and nut butter together and combine until smooth. Mix all the ingredients together until well combined. Pour into a small greased (or lined) cookie pan. Flatten and compact the mixture with two slightly wet spatulas (you can use your moistened fingers too). If your pan is too big for the mixture (as mine was) don’t use the whole pan for the mixture, create a rectangle the right depth (about 2 cm) pulling the mixture together with the spatulas and straightening out the sides.
Place in the freezer for half an hour until set and cooled. Turn out onto a board and cut into the desired sizes. Store in an airtight container.
Great for snacks, treats and lunch boxes.
Keeping it simple.

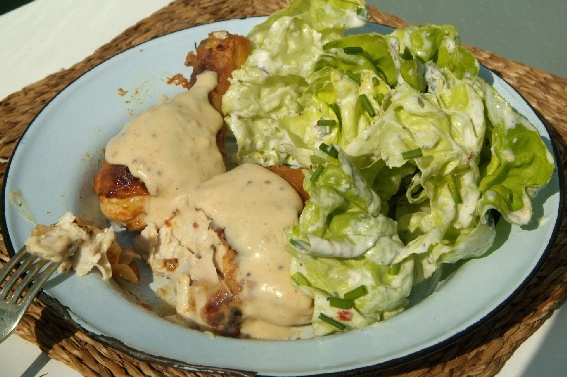
I am all for the simple things in life. Sometimes the simplest things can truly be the most rewarding. The lunch I made yesterday was just like that. I marinated some chicken pieces, baked them for half an hour, tossed together a salad and there was lunch. Succulent and tasty. Naturally, one should have a few good tricks up one’s sleeve, but the bottom line is keep it simple.
My chicken marinade was based on one I learned from a Muslim client of mine. The base of the marinade is yoghurt, to that you add garlic, ginger and chilli and then the seasoning of your choice. I added tikka masala; marinated the chicken pieces for a few hours and then baked them in a preheated oven at 200C˚ for 30 minutes (if the chicken isn’t cooked through drop the heat to 180C˚ and bake for a further 10 – 20 minutes – if the chicken is browning too much cover it with foil).
The salad is a recipe from my German grandmother – butter lettuce tossed in a garlicy sour cream dressing and topped with chopped chives. It really is heavenly. You start by making the dressing in the bowl you are going to toss the leaves in. Start with a few spoons of sour cream (about 1 Tbsp per person eating) then add some lemon juice, pressed garlic, salt and black pepper (a pinch of sugar if desired). Mix it up and toss the leaves through it. Top this with chopped chives. So simple but way more delicious than you can imagine. You can substitute the sour cream with yoghurt, but it really just isn’t the same.
Adding gravy kind of diverged from the simplicity of the meal and really wasn’t necessary. So I’m going to leave it at that.
If anyone is devastated that there isn’t an exact recipe for the above, mail me and I’ll write one for you.
Beyond improvement brownies!

A few weeks ago while I was looking after my sisters kids, we had a super cold and wet day. So I suggested that we do some baking. Oddly enough the boys were more keen on baking than the girls. The youngest chose a gingerbread men recipe (or ginger bread ‘people’, as I was corrected) and the older boy wanted to bake his favorite chocolate brownie recipe. We have baked this recipe together twice before and this time he wanted to adapt it using milk chocolate as he is not crazy about dark chocolate.
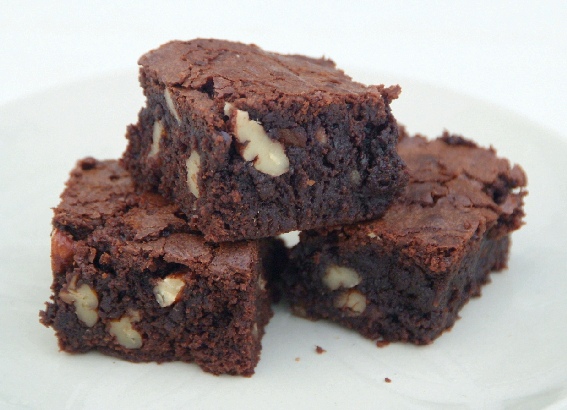
The original recipe is by Jamie Oliver and, in my opinion, cannot be improved upon. It is simply to die for. The only amendments to the recipe below, is Max’s adaption using milk chocolate, I upped the nut quantity (I love nuts) and I have increased the baking time, is it really just too runny with only 25 minutes baking time.
I want to add that the below picture is of the brownies, Max (aged 10), made all on his own. I did not help him at all!
I would love to give you the gingerbread men recipe, but it had to improvised a bit as the kids added about 4 times too much butter to the recipe by accident and I had to add a bit here and a lot there to get the consistency right again. They ended up tasting pretty nice too, but I have no idea how I got there.

Chocolate brownies from heaven
250g butter
200g dark or milk chocolate (your preference), broken up
100g chopped nuts, (I like pecan nuts)
80g cocoa powder, sifted
65g plain flour, sifted
1 tsp of baking powder
360g of caster sugar
4 large eggs
Preheat your oven to 180°C. Line a 25cm square baking tin with greaseproof paper. In a large bowl over some simmering water, melt the butter and the chocolate and mix until smooth. Add the nuts and stir to combine. In a separate bowl, sift together the cocoa powder, flour, baking powder and sugar; then add this to the chocolate and nut mixture. Fold this together well with a wooden spoon. Beat the eggs and mix into the main mixture until you have a silky consistency.
Pour your brownie mix into the baking tray, and place in the oven for around 35 – 40 minutes. You don’t want to overcook them so, unlike cakes, you don’t want a skewer to come out all clean. The brownies should be slightly springy on the outside but still a little bit gooey in the middle. Allow to cool in the tray, then carefully transfer to a large chopping board and cut into chunky squares.
PS – I made another batch of these for my cousin and her five year old son, told me that he had never eaten anything as good in his life before!
Kitka’licious!

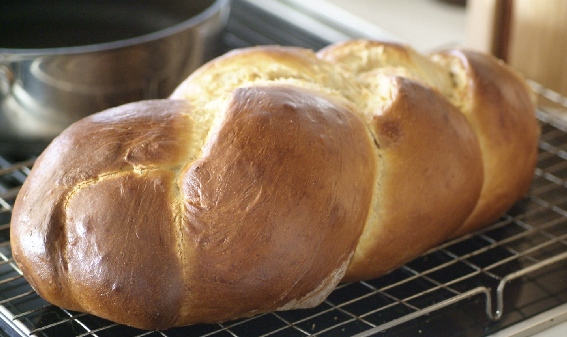
One of the recipes a client of mine wanted me to teach her housekeeper was how to make kitka bread (challah bread) for their Friday evening family dinners. She gave me a recipe and I tried it out at home so that I could feel sure that I could train the recipe. I was so impressed with the outcome. It had a dense crumb but still light in texture, it had a lovely rich almost sweetish (but not) flavor and was lovely and moist. This is most definitely a bread recipe which will become standard in our household now. We managed to polish the whole lot in 2 days.
My second try, which was in the training session, was just as successful and I am waiting to hear how the lady I have been working with manages to recreate the recipe on her own now.

Kitka Bread (Challah)
Makes one large loaf or two small loaves
1 1/2 cups of lukewarm water
1/3 of a cup of sugar (80ml)
5g of active yeast (½ a Tbsp)
2 large eggs
1/3 of a cup of vegetable oil (80ml)
4 cups of flour (sifted)
2 tsp of salt
1 cup of flour (for kneading and flouring surfaces)
1 egg yolk
1Tbsp of water
In a bowl combine the warm water, sugar and yeast. Leave this for 10 minutes or so to see if the yeast is active. It should start to bubble if it is.
Whisk together the egg and oil and sift together the dry ingredients. Combine the yeast, egg and flour mixtures in a blender until they form a sticky dough. With floured hands roll the dough into a ball and leave it in a mixing bowl covered with a lappie in a warm place and allow it to double in size.
Once it has doubled in size, knead it on a floured surface for 10 minutes or so. Then set it aside again until it has doubled in size. Knead it down one last time.
Pre-heat your oven to 180C˚ and place the rack in the middle of the oven.
Divide the dough into three equal pieces. Roll each piece into a long sausage on a floured surface. Stick the ends on one side together and plait the bread. Then stick the pieces on the other side together. Click here for a video link on how to plait the bread.
With a pastry brush, brush the bread with the yolk and water mixture. Bake it for about 25 minutes (for the small loaves) or 35 – 40 minutes (for the large loaf) until the bread is caramel brown and hollow sounding when you knock it. Remove the bread from the oven and allow it to cool. Store in a dry place.
National obsessions…

I make no secret about the fact that I hate braaing, and mostly I hate going to braais too. But there is no escaping this national obsession, so if I do attend one I usually try to contribute by making the side dishes interesting, finding something which Adam can eat (being a vegetarian) and trying to encourage and assist who ever is doing the braaing, so that we can eat at a reasonable time…
For today’s blog I have compiled a few of my recipes which I have made for braai’s in the past. I try to make the salads robust, as that is what you mostly end up eating while waiting for the meat… I love the tenderised chicken fillets because they are perfect to braai while the flames and heat are too high for other meats, so you can get the kids fed and also have a tasty snack while… waiting for the meat. I have added a rare roast lamb recipe which would also be perfect as it is quick and also needs high heat in order to be cooked to it’s best potential, so that once the coals are ready… the meat can cook quickly…
I am not saying that all braai’s take forever to finally get the meat to the table, but just 95% of all braai’s I have ever attended.


This rare roast lamb is ridiculously delicious – it can be done as a deboned leg of lamb, butterflied on the braai and then served into pita’s as shown above.
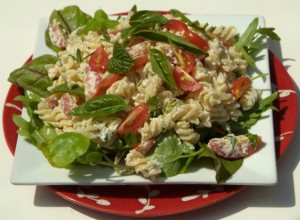
I’m not usually a pasta salad kind of person, but this one ROCKS!!! I love ricotta and it’s so healthy and filling without the guilty mayo sauce of other pasta salads.

Potato salad just belongs to a braai in my opinion, but once you’ve made mayo yourself then also made a potato salad you will run screaming into the night at the sight of one. This one takes the guilt out of the salad, but not the flavour!

This roasted butternut, broccoli and barley salad is more than just a salad, it is pretty much a meal on a plate, but is also a great side dish and takes care of the veggie and starch elements of your meal all at the same time. Beware though, it’s totally addictive.
The picture right at the top of this blog is one recipe I have not shared here and it’s one of Adam’s favorite things on the braai – all the other guests will love it too though.
VEGGIE PARCELS FOR THE BRAAI
Veggie accompaniments are few and far between at a braai. These veggie parcels are a 100% winner. They can be pre prepared and kept ready to pop around the sides of the braai about 20 minutes before the meal is ready. Choose a selection of your family’s favourite veggies. You can make a separate parcel for the kids choosing the veggies they like and add milder flavourings, while for the adults you can add a wider selection of aromatic flavours.
Method
Chop up the veggies (about ½ cm cubes) such as butternut, carrots, bell peppers, mushrooms, tomatoes (not too many as they get very watery), onions, courgettes, sweet corn, sweet potato, spinach and celery are good choices. You can flavour the veggies with a dash of oil, a few cubes of butter, salt, pepper, chopped garlic, chopped chilli, chopped fresh ginger, fresh herbs, basil pesto, chutney, crumbled feta and such things. Make the foil parcels from a sheet about 40cm–50cm of foil (use a double layer of tin foil to protect the parcels from burning). Place the veggies and your choice of flavourants in the center of the foil and seal the sides and the top so that the juices will not escape. Set aside until ready for use. Place the parcels around the sides of the fire. Turn the parcels every 5 minutes or so. They should be ready in about 15–20 minutes.
Serve immediately.
Pastaholic goes domestic.

Today I have a guest blog written by Annika Ziehen aka anysroad, who I have mentioned and referred to in many of my blogs. She is my cousin, close friend, fellow foodie and blogger. Her blog is however not a food blog even though it does come up quite a lot. She is a fabulous cook and despite being ‘new’ to Cape Town is constantly introducing me to the latest food hot spots. The dish she is writing about is one which she apparently eats almost weekly and has chosen to write about because she knows that I like my recipes to be quick and easy and with locally accessible ingredients.
She cooked it for us yesterday and it was delicious. Simple and so tasty. I loved the fresh rocket, it really set it apart for me. Okay, enough from me… over to Annika:


So now it has finally happened: I am asked to do my very first guest post. I do know that it is based utterly and completely on nepotism, but I can’t help feeling excited and quite honoured either way. Due to the nature of this blog I will have to show my domestic goddess side i.e. cook something. What people don’t know is that I can cook other things than pasta, but since I am known as the pasta auntie and am a self dubbed pastaholic, I will stick true to form and write about pasta. Thekla promised to take care of the recipe since I am one of these horrible people that just throw stuff together till it tastes good (or not … the system isn’t foolproof) and never measure a thing. I’m not judging though, people cook differently and if you need to have a recipe that’s fine. Just don’t date me. That may lead to utter disaster as a previous relationship has shown. It often got heated in the kitchen and not in a good, Nine ½ Weeks kind of way.
The dish (I won’t call it a recipe as it’s not) is something that evolved from a pasta meal a friend once made for a dinner party and a dish they served on a wine farm we went to for my birthday a few years ago. Both evoke my love for grilled cherry tomatoes and I finally understood why a tomato loves the sugar. You could call it “Roast veggie pasta with fresh rocket and a bucket of parmesan cheese.” It doesn’t have the usual sauce superstars i.e. meat or alcohol, in fact it doesn’t even have a real sauce, but I promise it rocks.
Okay, here we go…I promise it’s really easy, don’t be scared, don’t overthink…
First things first – pour yourself a nice big glass of wine. Then boil pasta. Easy enough. The water must cook first before you add salt. This is the order and there is some scientific explanation to it, which my Dad once gave me, but I forgot. Just do it. Any short pasta i.e. Penne, Fusilli, Shells is good. Barilla actually makes nice whole wheat pasta if you wanted to go healthier. I like it because it actually tastes quite non-whole-wheat-y.
Chop mushrooms into quarters and butternut in small-ish pieces and put on a baking tray with cherry tomatoes. Douse them all in lots of olive oil, salt, pepper, and roll around. The tomatoes also get some sugar on top. Into a pre heated oven at about 200 degree for 15 minutes or until the butternut has cooked through. For the last few minutes turn on the grill. Mushrooms should be brown, butternut soft and tomatoes mushy and juicy. Toss together with pasta and top with some rocket, basil and of course lots of parmesan cheese. For this dish I think it’s important to get a good one and grate it into big flakes. It just adds another texture to the dish.
Pour another glass of wine. Eat. Smile.
Images of yesterday…

Yesterday was a spectacularly beautiful spring day in Cape Town. So I whipped out my camera and took a few pictures, in and around my sisters house where I am looking after her kids for a week.

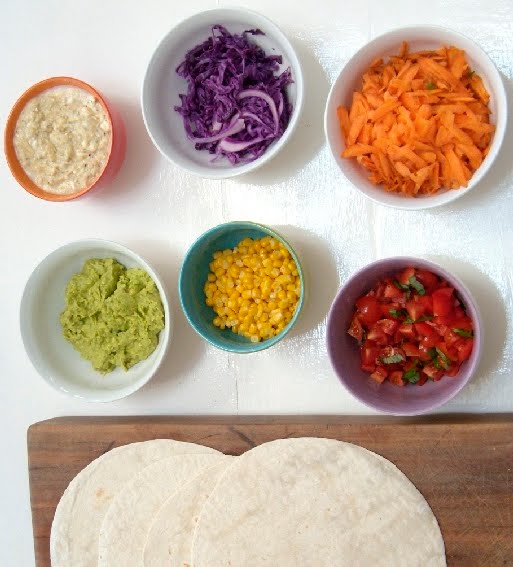
Lunch was wraps with a selection of fillings: hummus and cottage cheese; guacamole; blanched red cabbage, grated carrot; baby tomato and basil salsa and sweetcorn. My sister has raised her kids with a taste for healthy eating.


In the afternoon I made an apple crumble as there were so many apples in the house. I only realized after I had started that butter was in short supply, so I substituted peanut butter in the place of the missing measure of butter. It was DELICIOUS!!!

The below picture is a picture of granny which my sister has had blown up and put on canvas. She sent this to my grandfather as a memento, the note she wrote on the photo was “Just me on the rocks” – I love the coy casualness!

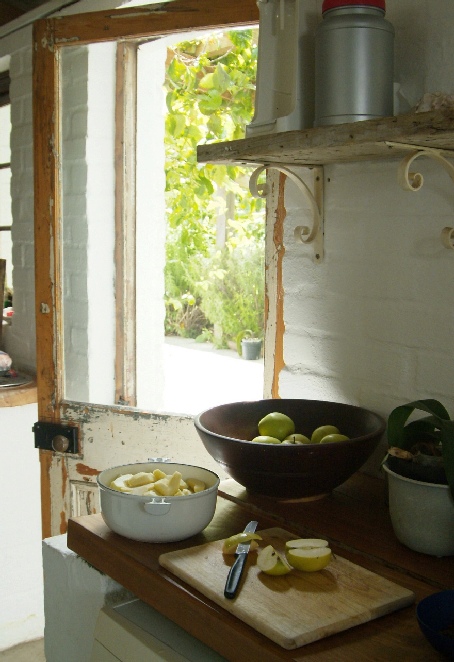
This blog makes me happy!

Today I am getting ready to spend the week in Hout Bay looking after my sisters 5 kids and menagerie of animals while she and her husband are in Turkey. I am truly looking forward to spending QT with the children and taking a dip into what full time family life feels like.
The blog I have posted above, Cannelle et Vanille, is what fantasies are made of. All brightly colored with suffused hazy light, pretty children and fruit trees. Country living with style and grace.
It makes me happy and I am pretending that this next week will be just like that!
Wish me luck!

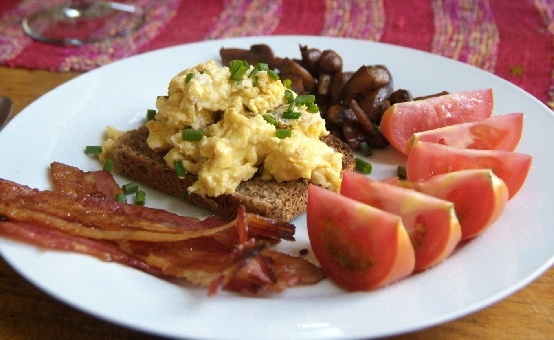
Weekend fry up!
I am a big fan of a full house breakfast but I am always amazed at how often they are just rubbery grease fests. It doesn’t have to be that way. Now I’m the last person to hold back on the butter and cream but there is a threshold where rich and creamy becomes greasy and nauseating. I cooked a brunch last Saturday which for me hit the spot 100%. Creamy scrambled eggs with fresh chives on whole wheat bread, crispy grilled bacon, sautéed mushrooms and fresh tomato. It was the perfect balance of salty fry up with a fresh wholesome edge which left me feeling good rather than guilty.
Despite seeming like the easy way to make eggs, scrambled eggs can be quite tricky to get right. The method I use is easy but you need to get the timing right. Only start the eggs once all the other elements of your meal are almost good to go. You need 2 Tbsp (30ml) of water, milk or cream per egg. Keep the seasoning simple – salt, pepper and fresh chives or spring onions if you have. Whisk the eggs with a fork. Heat a non stick pan on medium heat, add some butter or olive oil and once melted add the scrambled eggs and don’t stir or move the mixture at all until it has cooked halfway through. Then remove the pan from the heat, scramble the eggs and allow the retained heat from the eggs and the pan to do the rest of the cooking. Serve immediately. The eggs will not be ‘snotty’ – there is enough heat to finish the cooking process completely while still keeping your eggs soft and moist.

I have written about the perfect way to sauté mushrooms many times before so you can just click through to this link.

Perfectly grilled bacon is another passion of mine and also something which I have burned more time than I care to admit. The timing between perfectly crispy bacon and burned bacon is a minute or two, so one needs to keep ones eye on it. I pre-heat my oven to 220C˚, I lay my rashers of streaky bacon (I prefer streaky bacon to back bacon) on an oven tray and place them in the fully pre-heated oven for about 10 – 15 minutes. Set your timer to 10 minutes and then keep an eye on them. You want the bacon fat to turn a caramel colour, then remove it from the oven and serve. I like to use the drippings from the pan to fry my scrambled eggs with but that is totally optional.
I chose to use fresh tomatoes because I thought that grilled tomatoes would just be overkill and I was very happy with that decision. In fact after writing this all… I am pretty set on having a little fry up for lunch… the joys of working from home 😉


